Guru Session #11: GLSL Shaders (Wed Apr 29th, 6pm CEST/5pm GMT/12pm EDT/9am PDT)
-
@mark - thankyou - most of the other shaders didnt have a second input so I wasnt really focusing on that, but seems to be a clue to the puzzle. replacing that with the bayer tile from here https://www.shadertoy.com/view/WtsXW2 (channel 0 menu) seems to help? anyway, I'll keep experimenting - thanks again for the tips
Sam Meech - artist and videosmith - hello@smeech.co.uk | @videosmithery
MacBook Pro (Retina, 13-inch, Mid 2014 - OS 10.13.6 Hi Sierra) -
[NOTE: my reply is for Sam, but this info is useful for all! Please read. ;-) ]
OK, I think I've gotten some dithers worked out for you.
First, regarding the ShaderToy code for Dither Webcam:
Remember what I said in the tutorial regarding looking at the iChannel0, iChannel1, inputs, etc. Look at this part of the page:

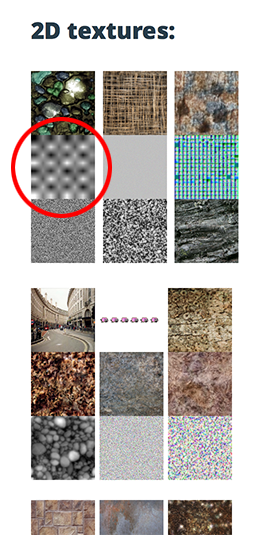
The webcam is video input 1 (iChannel0) but it needs a texture for video input 2, as seen in the iChannel1 input. The problem with ShaderToy is that it is not very apparent which texture has been chosen because it's scaling and anti-aliasing it in the preview. :-(
In the end, I determined it was the texture called Bayer which is an 8x8 grid of greyscale values. (Bayer is a technique used for dithering, that was my clue.)
But then the question becomes, how do you get that texture? At the moment, the site ShaderToy Unofficial has a page that gives links to the textures under the section ShaderToy Media Files. Hopefully the image I've circled looks familiar from above:
So I clicked that and downloaded it. If you provide that as the second input, the dithering works.
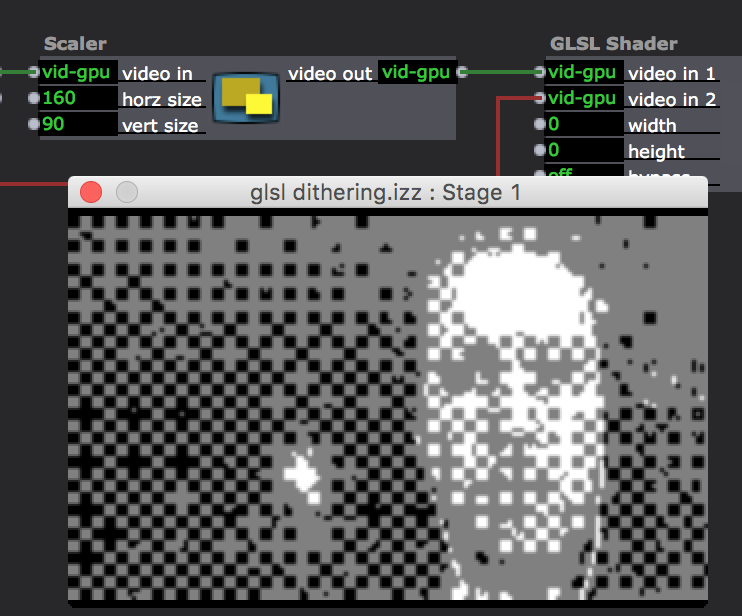
I also worked around the error in the ShaderToy 4x4 Bayer Dithering shader. It needs to do an integer modulo operation (the '%' operator) which macOS doesn't want to do. But I created a function to peform the modulo called "modulo" which you'll see in the code.
In addition, I added a 'color amt' parameter to this shader to allow you to see the dithered color (the default for the ShaderToy) or a black and white version.
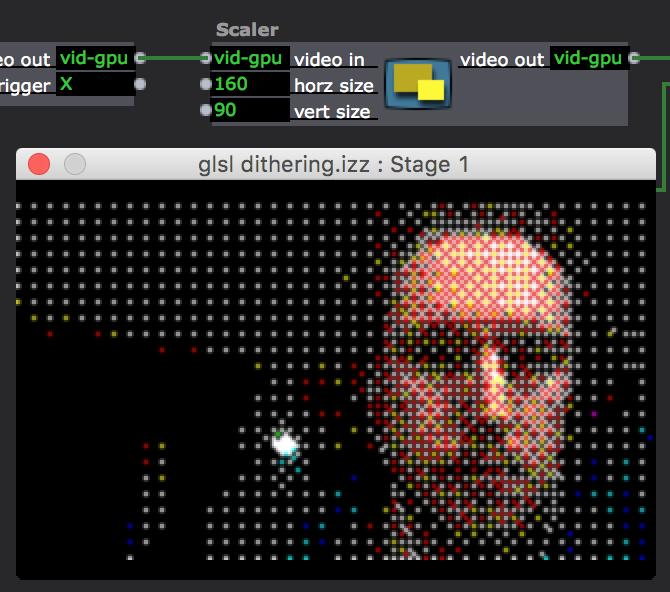
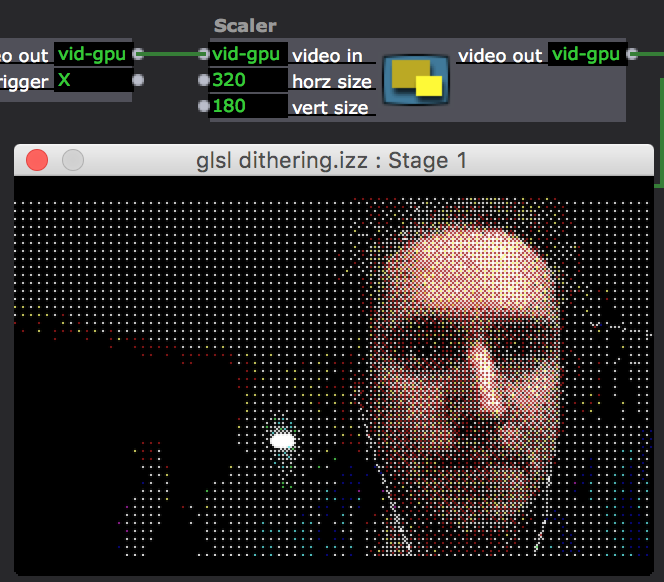
For both of these shaders, I made three scenes: one at the native resolution of the camera, one scaled to 640x360, and one scaled to 320x180. This will change the look of the final image, as smaller images may give you more of what you were hoping for.
I also made three versions of the bayer image png for the Dither Webcam patches. The 8x8 one I downloaded from ShaderToy Unofficial didn't look as good as a 96x96 pixel image I got from ShaderToy itself. The patches are set to use the 96x96 pixel version of the 8x8 matrix, but you can experiment with the 8x8 pixel, 96x96pixel, and 192x192pixel matrix images to see what you like best.
Let me know what you find and if this gives you what you were looking for.
Best WIshes,
MarkMedia Artist & Creator of Isadora
Macintosh SE-30, 32 Mb RAM, MacOS 7.6, Dual Floppy Drives -
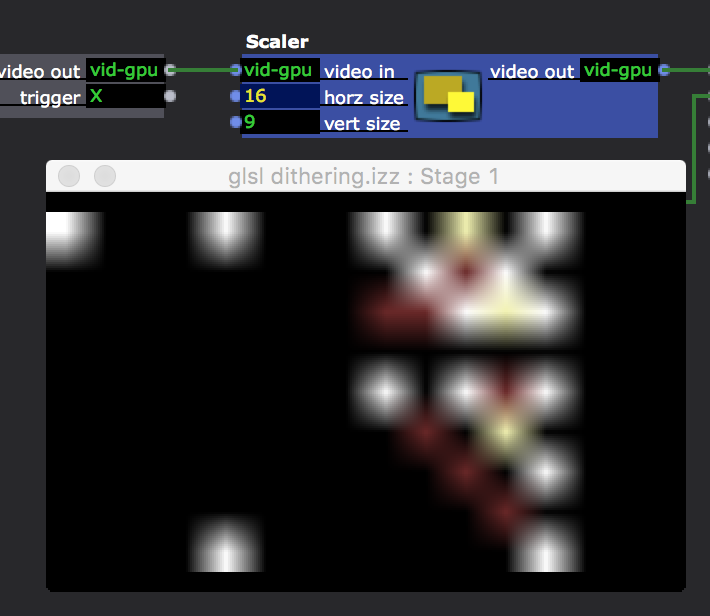
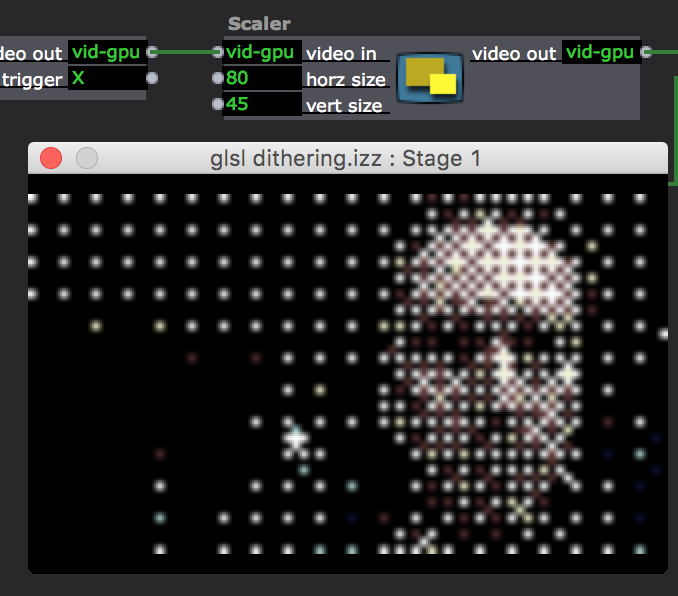
@mark thankyou, this is great! - I'm definitely getting a better range of sizes by using the izzy scaler and the bayer tile.The lowest I can seem to keep it relatively crisp is about 160 x 90. (my need to get it lower is funnily enough to generate knitting patterns!)
Sam Meech - artist and videosmith - hello@smeech.co.uk | @videosmithery
MacBook Pro (Retina, 13-inch, Mid 2014 - OS 10.13.6 Hi Sierra) -
Well, one of the problems is that Isadora is going to scale this image up to the stage size, and then it's going to get blurry because of the scaling.
If you need the image to stay really low res, set the stage size to something low in the Stage Setup editor, and then use the "Capture Stage to Picture" actor to grab a picture at that resolution.You can then scale it up in an image editing program. Here's a patch with the stage set to a custom size of 128x72 as shown below.

Here's an example snap of the stage using my webcam.
Same image scaled up in Photoshop using Nearest Neighbor resampling to preserve the hard edges:

And a black and white version...

Maybe that helps?
Here's the patch: glsl dithering small stage.izz
Best Wishes,
MarkMedia Artist & Creator of Isadora
Macintosh SE-30, 32 Mb RAM, MacOS 7.6, Dual Floppy Drives -
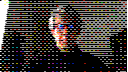
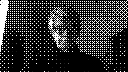
@mark cheers again for looking at this - it seems like a good work around at least for creating still images outseide of real-time. here is a 128 x 72 stage capture scaled up in photoshop x 300 % , and a 32 x 18 scaled up 1000%

-
Thanks for this session!
GLSL seems to be a great way to manipulate images and adding some customs tools in Isadora.
I've been playing a bit with some Shadertoy shaders, and I found this answer from @mark about multi-pass shaders on the forum very useful: https://community.troikatronix... That works well. Maybe those informations could be added to the GLSL Shader Actor Tutorial ?
I would add that sometimes, in a multi-pass shader, when a "channel" needs itself (by example if iChannel0 calls iChannel0), we can add an empty GLSL node to make a loop. Here is a little example based on this reaction-diffusion shader: https://www.shadertoy.com/view... Reaction-diffusion_002.izz (sorry I'm still on 2.6).
Otherwise, there are some amazing shaders that use cubemaps on Shadertoy. I know there is a lot of work in many areas on Isadora, and I don't know how much it's complicated to make it working, but it could be a very cool feature for a next release!
Or maybe someone knows a way to avoid cubemaps (I was wondering if it's possible to use 2d textures as a cubemap...) ? -
Hi Mark....fantastic resource the guru sessions....have watched all but one - you're a fantastic tutor :-) I'm having an issue with getting the isf shaders to batch convert using the windows bat file you included. I've included the command window response for your perusal. I'm pretty sure I have the files and the bat command in the same download file....but maybe its me.
Regards
Gavin
-
@light-fx-uk said:
I've included the command window response for your perusal.
Where? I don' see it.
Best Wishes,
Mark -

@mark sorry its here.....ony recently entered the forums so finding my feet....
-
Did you download the ISF files to your downloads folder?
1) Go to the ISF Files github
2) Click the "Clone or Download" button and choose "Download ZIP"
3) After the download completes, verify you now have a file called ISF-Files-master.zip in your download folders.
4) Right-click the .zip file and extract the contents of the .zip so that you see a folder called ISF-Files-master in your downloads folder. (Here are instructions on how to extract a zip file to a folder.)The script if the ISF-Files-master folder is in your downloads folder.
Best Wishes,
Mark -
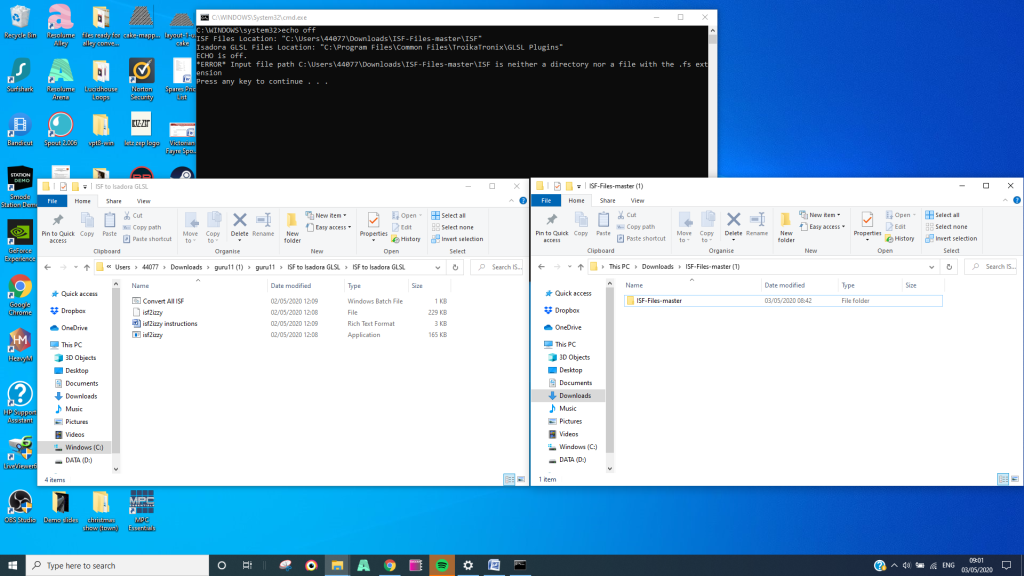
@mark Hi Mark, yes ISF-Files-master is in my downloads folder, I ran the script but unfortunately no success.....it's probably my fault but a bit stumped on this one. See further screen grab, following another test. I downloaded everything again just to make sure.......
-
From what I see above, the path in your downloads folder is something like
C:\Users\YOUR_USER_FOLDER_NAME\Downloads\ISF-Files-Master (1)\ISF Files master
that won't work. (The underlined and bold part is wrong.) It must be exactly:
C:\Users\YOUR_USER_FOLDER_NAME\Downloads\ISF-Files-Master
Best Wishes,
Mark -
@mark thankyou will delete that folder and try again.....EDIT....it worked a dream.....massive thumbs up!
-
@light-fx-uk said:
massive thumbs up!
Thank you for letting me know. I will make the instructions clearer.
Best Wishes,
Mark -
@juriaan,
sorry for the super late reply;
here's my code for one of the tries
uniform float noise_level;
// ISADORA_FLOAT_PARAM (noise_level, noil, 0.0, 1.0, 0.5, "dit is de text  die helpt");
uniform float dark_factor;
// ISADORA_FLOAT_PARAM (dark_factor, dkfa, 0.0, 1.0, 0.5, "dit is wat het doet");
// #define NOISE_LEVEL 0.25
// #define DARKEN_FACTOR 0.125
#define DENOMINATOR vec2(213, 5.53)
#define NEG_X vec2(-1.0, 1.0)
#define NEG_Y vec2(1.0, -1.0)
#define GLITCH_OFFSET_1 vec2(32.05, 236.0)
#define GLITCH_OFFSET_2 vec2(-62.05, -36.0)
float rand(vec2 co)
{
 return fract(sin(dot(co.xy, vec2(12.9898, 78.233))) * 43758.5453);
}
void mainImage(out vec4 fragColor, in vec2 fragCoord)
{
 vec2 uv = fragCoord.xy / iResolution.xy;

    // Scanline desync
 if (mod(iTime, 2.0) > 1.9)
 uv.x += cos(iTime * 10.0 + uv.y * 1000.0) * 0.01;

    // Pixelate glitch 1
    if (mod(iTime, 4.0) > 3.0)
 uv = floor(uv * 32.0) / 32.0;
    // Pixelate glitch 2
 if (mod(iTime, 5.0) > 3.75)
    uv += 1.0 / 64.0 * (2.0 * vec2(
            rand(floor(uv * 32.0) + GLITCH_OFFSET_1),
            rand(floor(uv.y * 32.0) + GLITCH_OFFSET_2)) - 1.0);
fragColor = texture(iChannel0, uv);
    fragColor.rgb
        += noise_level
        * vec3(rand(iTime + fragCoord / DENOMINATOR * NEG_X),
               rand(iTime - fragCoord / DENOMINATOR * NEG_Y),
               rand(iTime + fragCoord / DENOMINATOR))
        - dark_factor;


}
Astrid
mostly on:
MacBook Pro (15-inch, 2018)
2,2GHz 6- Core i7
16 GB 2400 MHZ DDR4
Radeon Pro 555X 4 GB
Intel UHD Graphics 630 1536 MB -
Remove the space between ISADORA_FLOAT_PARAM and (
So the second one ;) The first one is your example
// ISADORA_FLOAT_PARAM (noise_level, noil, 0.0, 1.0, 0.5, "This is the text that helps");
// ISADORA_FLOAT_PARAM(noise_level, noil, 0.0, 1.0, 0.5, "This is the text that helps");