Isadora 4 - Adjusting blend overlap
-
I have two matching projectors (1920x1200) set apart not quite at the center of their respective shares of a 48'x18' cyclorama -- they are pointing slightly outwards from center.
I have set up a stage in Isadora at 2667x1200 as this comes closest to matching the image size of 2400x1080 resized to 1200v pixels.
Isadora calculates the overlap at 1173px -- which is too much and it is causing distortion (repetition) of parts of the image in the blend.
Adjusting the displays only limits the output, so the problem lies in the amount of blend overlap. Take a look at these images to see the extent of the distortion.
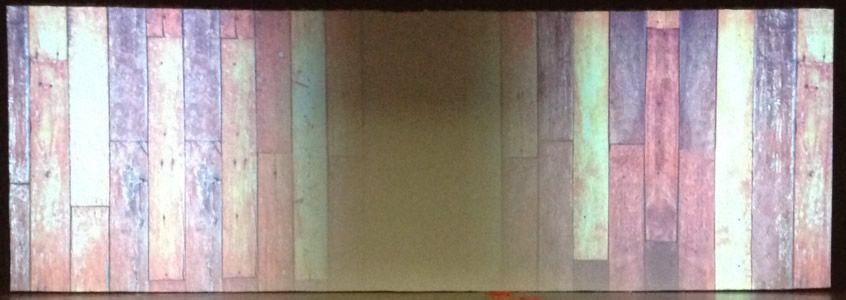
RAW PROJECTIONS
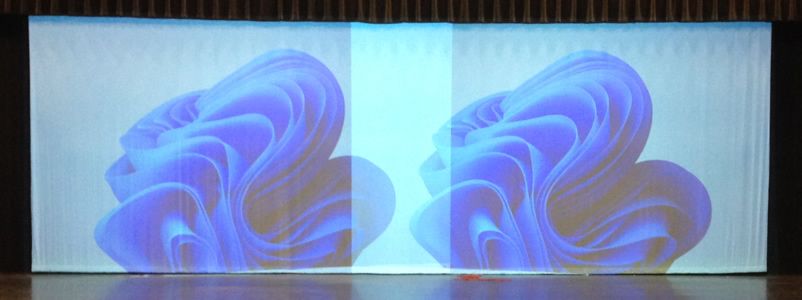
Here, you can see the actual light overlap of the two projectors.
STAGE VIEW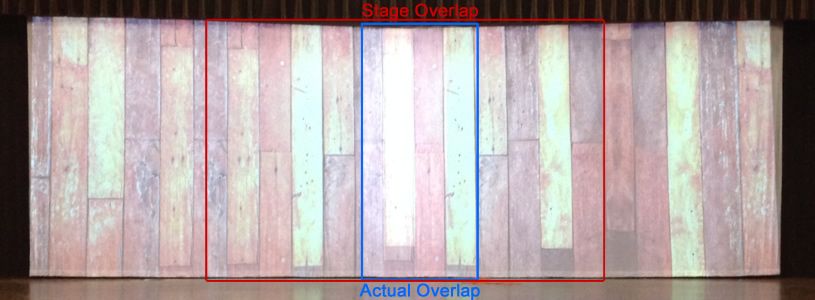
Although not disturbing to this image, this shows the size difference between the actual overlap and the calculated stage overlap. The problem is more evident in this image (I have the blend settings set to extremes so the images are visible):
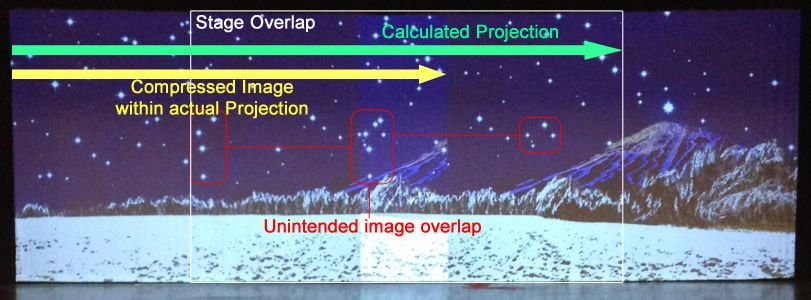
Since Isadora assumes the projector width overlaps by an overly wide amount, it takes the image portion calculated by that overlap and assigns those to the two projectors. In reality, that portion of the image is then compressed into the actual projection. With this happening on both projectors, there is a wide range of unintended image overlap.
I think the solution is to tell Isadora the actual amount of visual overlap. That should provide the proper portion of the image to each projector, thereby allowing the blend (when those controls are turned on) to function properly.
So HOW do I adjust that overlap? Thanks!
-
Have you tried the 'blend maker'?
Using it with your projector resolution, setup in a horizontal 2x1 format as you have show, the blend maker creates a 3456x1200 px output by default. This has a 384 pixel blend area.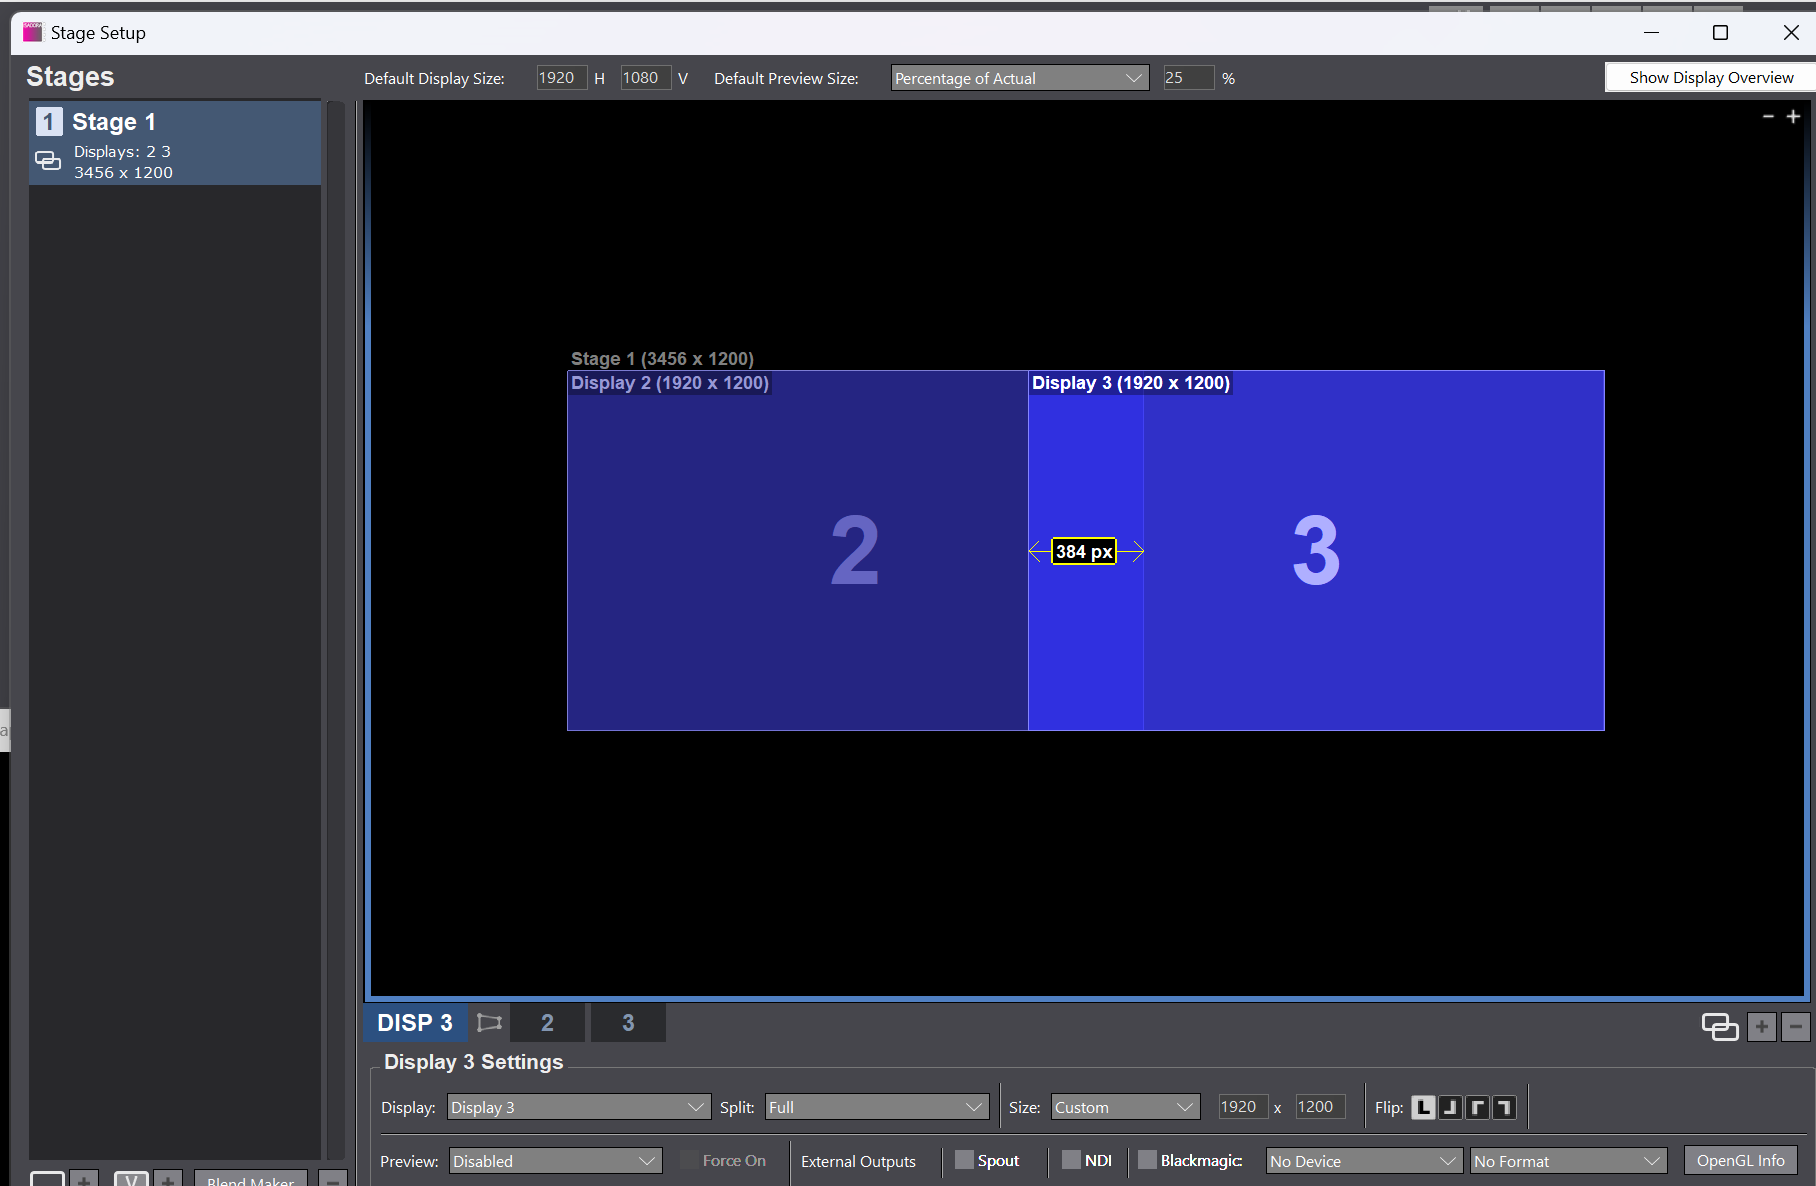
-
@dusx Thanks. I did use the blend maker and saw that initial 300+ px overlap. However, two things then happened.
- The movie I placed in cue was smaller than that stage, so I had to make the stage smaller.
- Due to physical constraints, my projector connections place them as displays 3 & 2 instead of 2 & 3. When I drag them to the correct sides so the image is [ ] instead of ][, that overlap changes.
I will go back and see if I can overcome #1 above.
-
to create a 2667 wide image from 2 1920 wide projectors, you will have a 1,173 overlap.
Have you tried adjusting the blend curve?
If you click on the distance value for the blend area in the stage setup, it will open a side panel with curve adjustments for the blend. So using the example of the image I included above, you click on '384' and a side panel on the right will open allowing you to adjust the blend curves.
Also, if you click the display tabs (in the case of my example image, you click the '2' or '3' tab located right of the 'DISP 3' tab) you will get the display settings, there you ca re-assign wich display is used for the section of the blend. This will allow you to swap the displays you have linked.
-
@dusx Thank you for the assistance. I will look into the display properties to adjust which image is "left" and which is "right."
BLENDING
The default belnding mask looks like this:
I have been adjusting the blend curve, trying from the gamma view and the x-y view. I can get the blend to be very smooth and provide a nearly perfect gradiation of the brightness between the two projectors. However, when this is set well, that is when I can see the distortion mentioned above.
-
@abahmer said:
48'x18'
You need to fit the resolutions aspect to the real world aspect you get to the screen.
48 x 18 is an aspect of 2,667:1 which means:
1200px height multiplied by 2,667 is 3200px width. This would need to be the total stage resolution: 3200 x 1200.
This results in an overlap of 33,28% respective 639px.Your images have an aspect of 2,222:1, which won't fit to the screen you have.
If you would have a standard screen of 16:9, you would still won't be able to fit images with a different aspect. The stage would need to have the 16:9 aspect anyway, if you need to fill the screen. The same is true for blended screens.Therefor you don't use the images / video aspects/resolutions as the basis for the stage, but the real world screens resolution.
-
@dillthekraut Thanks for that.
I worked up the math based on the measurements of the screen and then used the vertical projection resolution of 1200p to determine the width in pixels. After that, building a new blend master worked *very* well.
However, I had to tweak the projector "actors" so that the images & movies that weren't at that aspect (roughly 11:4) would look good. I used the zoom property to bring them to the correct width, then decreased the height factor to fit the screen.
After a bit of wrestling with the control grid to align the two projections, I was able to do a fairly good job with the blend.
Thanks for all the good ideas!