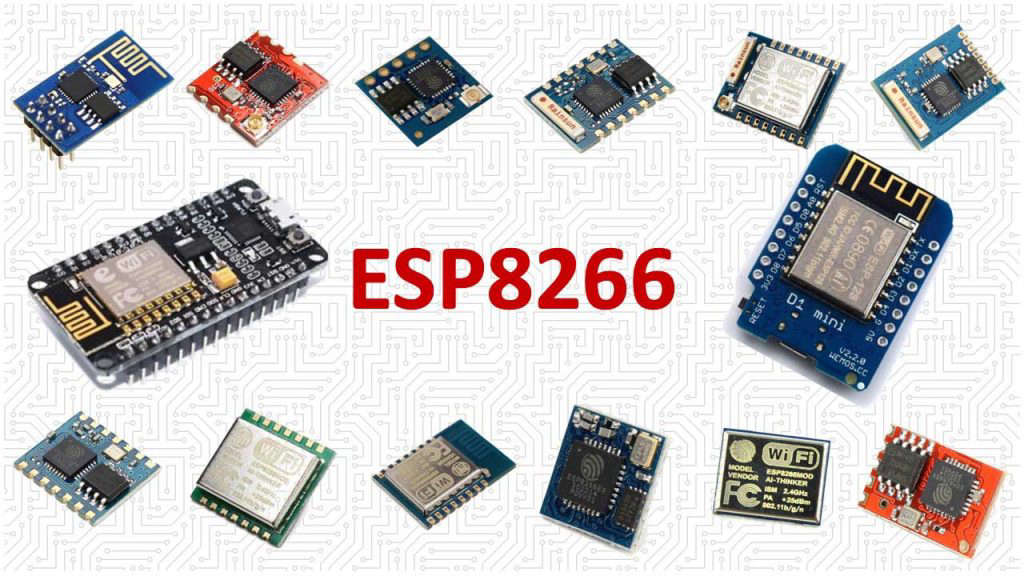
The ESP8226 is a cheap programmable WIFI board. They come in various flavors from the simple tiny ESP-01 to the larger NodeMcu. My favorite is the WeMos D1 mini. Which one you work with will be determined by the application you are going to get them to do for you and Isadora. There are plenty of places online that sell them, find a trustworthy seller as there are also a lot of cheap copies around. I usually buy two or three at a time just in case one is defective or I accidentally kill one whilst experimenting. There is a very good selection of modules that you can use to input into the ESP822s like the HC-SR04 Sonic sensor, IR transmitters and receivers, small lasers, humidity, temperature sensors, gyroscopes..an awful lot of things.
Power
If the ESP8226 device has a micro USB connector then you can power it with a phone USB battery brick. The WeMos D1 mini has a battery module that you can attach to the board which is pretty nifty. You can input 5V to most of the boards but it usually has to a regulated supply otherwise you might damage the board your powering.
Programming
This can be done via the Arduino IDE or Visual Studio Code. If you use the Arduino IDE then you will have to install the ESP8226 boards (see https://github.com/esp8266/Arduino). You can also useVisual Studio Code (https://code.visualstudio.com/) using Platform IO which installs the boards when you make the initial board selection (https://www.youtube.com/watch?v=0poh_2rBq7E&t=531s). You may have to install a driver so that your computer can see the attached board. (https://learn.sparkfun.com/tutorials/how-to-install-ftdi-drivers/mac) (
(https://www.arduino.cc/en/Guide/DriverInstallation)
Type in OSC in the search window and install the library
Go to the OSC examples and select the ESP8226RecieveMessage
Put in your WiFi details for the network your using at line 19 and 20. Put in the IP address of the computer your using (You can find this at the bottom of the Isadora preferences/midi/Net settings Local IP Address ). Make sure that you use a comma “,” between the numbers and not a dot “.”. At line 24 change the port number to the port number of the computer (by default 12345. You can change this in the Midi/Net preferences if you desire..just make sure they match with the number in the Arduino sketch). Compile and upload the sketch. In the serial monitor you will see the IP that the WeMos is using, make a note of it. If the serial monitor is printing rubbish the make sure the Baud rate is set to 112500 to match the rate defined in the setup at line 28. If the sketch doesn't compile then check you have set the board type to match the one you are using and also check the port in the tools menu.
Start up Isadora and a new patch and in the stream set up click on the auto detect. Change the channel number to 1. You should see the words “hello, osc.” appear. ?If not check the port numbers in your Arduino sketch and in Isadora. Click OK. The ESP8226 is now sending data to Isadora. Add an OSC Multi Listener to the ppatch. Make sure the num chan matches the one you just put in the stream settings. Toggle the show addr on and off and you should see the message “hello, osc.” and the /test show or not show on the actor.
Sending data from a Sonic sensor HC-SR04
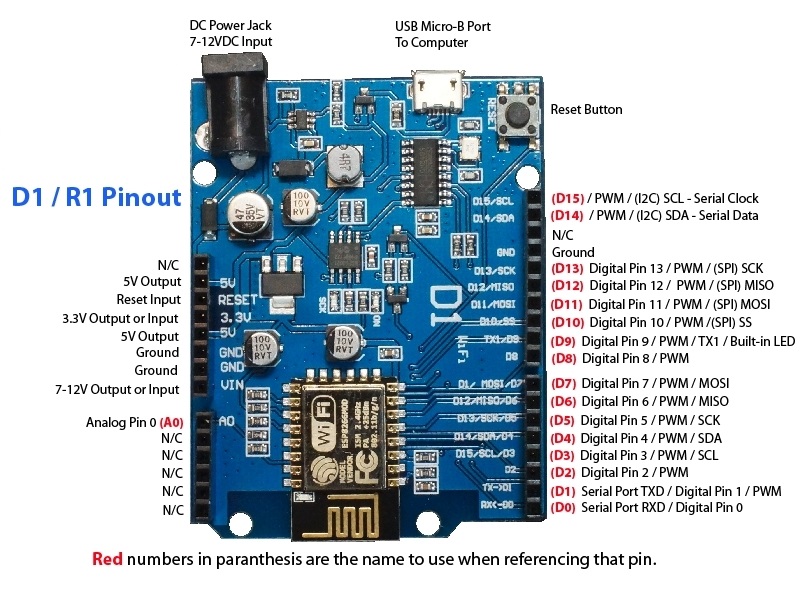
Connect the Sensor to the WeMos D1 using the pins below.
HC-SRO4 sensor | WeMos D1 R1 |
VCC | 5V Output |
Trig | Pin D12 |
Echo | Pin D13 |
GND | GND |
Put the sketch code below in a new sketch in the Arduino IDE, compile and Upload. In the serial monitor you should see the distance measured change as you move an object in front of the sensor. (If you want to improve the accuracy https://www.intorobotics.com/8-tutorials-to-solve-problems-and-improve-the-performance-of-hc-sr04/ ).
In Isadora add an OSC Multi Listener actor. As we are using the same message name “/test” the Sensor value should appear in the output of the actor. Set the input type to float and use a float to integer actor to convert the value.
code:// OSC_ESP8266sendMessage-sensor.ino.zip
Problems
If the sketch doesn't compile, check you have selected the right board in the tools menu. Did you install the Boards? Did you install the libraries? Compiles but won't upload, check you have selected the right port in the tools menu. Did you install the drivers?
Conclusion
All well and wonderful your device is streaming stuff into Isadora and everything works. You go to another venue, use the WiFi and everything stops. Maybe your computer IP has chsnged or the ESP8226s IP has changed (You can use a phone app like Fing to see whats on the Network your using and see the allocated IP numbers) You may have to upload all the new information (WiFi SSId and password etc) to each ESP8226 device your using. You could use the WiFiManager library to solve the SSID/Password issue and use a static IP on your computer to solve these problems. You can upload a sketch using OTA (Over The Air) (https://randomnerdtutorials.com/esp8266-ota-updates-with-arduino-ide-over-the-air/). I haven't tried this but it looks like a good solution. That's it for getting data from the ESP8226 using OSC and WiFi. Next..sending stuff to the ESP8226.
First, I deleted your cross-post. It really isn't necessary in our forum to cross post since most users check the recent/or unread view.
So, a few users have worked on wireless microController based feedback systems.
The one that comes to mind right away was something @bonemap pointed me toward sometime back. Perhaps he can share a link/details again.
One micro controller I know has been used (I have used as well) is the based on ESP8266
This search brings up a few interesting forum posts. (I think I see Bonemaps in there as well)
https://community.troikatronix...
@bonemap said:
post with a video of the unit in production
An update to the post with a video representation of the wearable sensors in action. I was sick with the flu when this was running, so I have relied on low res 'quick and dirty' social media video documentation made by audience members. It is one scene in the work.
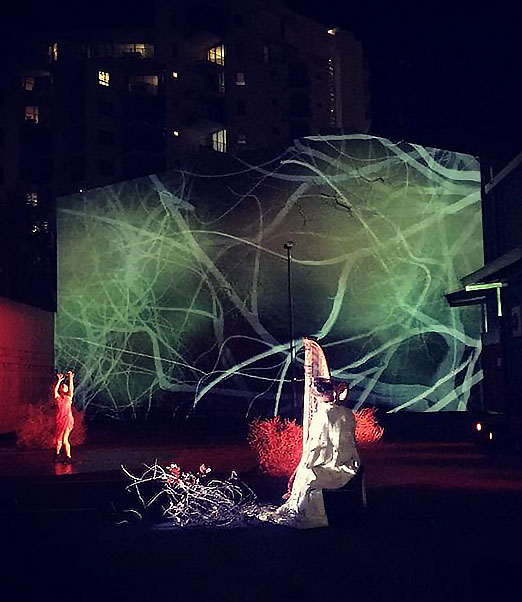
In this iteration the dancer is wearing three of the ESP8266 based wifi modules with accelerometers sending data to Isadora. One is incorporated into a chest plate shaped as a rib cage and another two - one for each hand. In the video, the chest mounted module is affecting the orientation of the 3D shader ("Seascape" by Alexander Alekseev aka TDM - 2014) using custom Isadora GLSL shader inputs. The two hand accelerometer modules provide data for the 'twig' like 3D objects. The wave height of the Seascape shader is also linked to the sound frequency of the analogue harp music captured with a pick-up. The work was presented in a carpark September 2017.
We are looking at the next stage prototype now that might use some form of (wifi, bluetooth or NFC) signal strength detection to develop proximity data between the modules, in an attempt to get autonomous relational data streams from the body (centre of gravity) and the limbs (as orbiting/satellite/moving points).
The other direction we are exploring is a module with interchangeable sensor components that get 'designed' into a custom PCB board and wearable enclosure. I am very interested in a modular system that can be used as a flexible solution - not just wearable - but also mountable. For example these thermal imaging sensors mounted for motion tracking which means looking into wireless video on the ESP8266. If anyone has already tried this it would be great to hear about it.
Best Wishes
bonemap
WeMos D1 mini
Battery module
Battery
MPU-6050
some wires
Isadora
Arduino IDE (https://www.arduino.cc/en/main/software)
ESP boards installed (https://github.com/esp8266/Arduino)
Adafruit MP-6050 library (Click the Manage Libraries ... menu item, search for Adafruit MPU6050, and select the Adafruit MPU6050 library and click Install:)
MPU-6050 library (Click the Manage Libraries ... menu item, search for MPU6050, and select the MPU6050 library and click Install:)
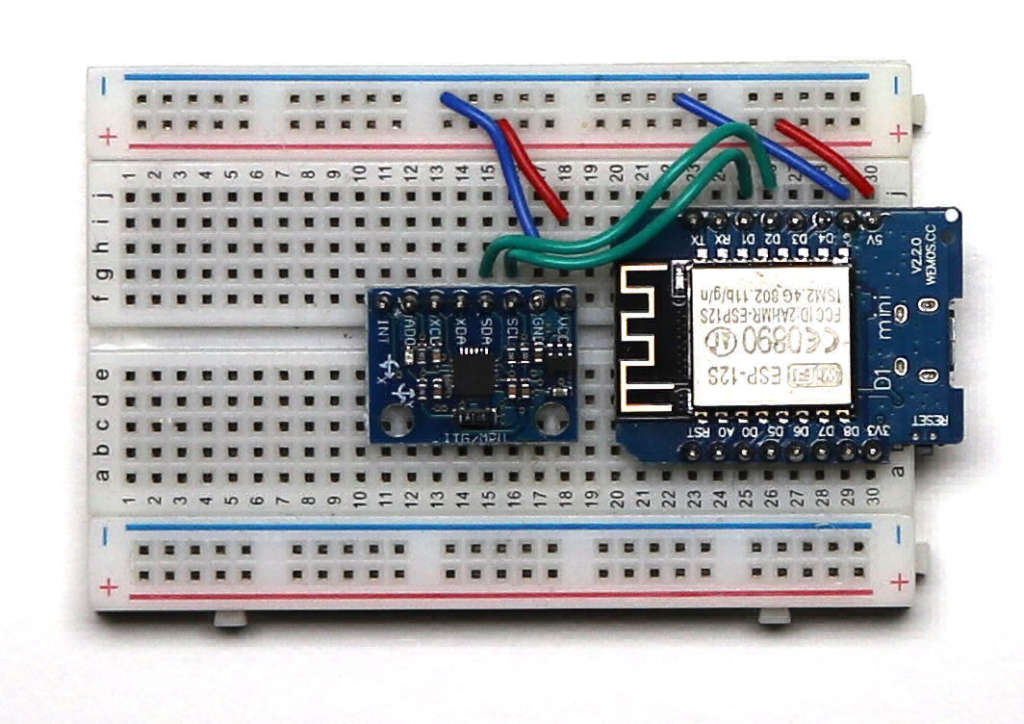
The InvenSense MPU-6050 sensor contains a MEMS accelerometer and a MEMS gyro in a single chip. It is very accurate, as it contains 16-bits analog to digital conversion hardware for each channel. Therefor it captures the x, y, and z channel at the same time. The sensor uses the I2C-bus to interface with the Arduino. (https://playground.arduino.cc/Main/MPU-6050/#easy)
Calibrate
I found that the MPU-6050 library examples didn't show up when the board WeMos D1 was selected. Just select the board to Arduino Uno load the IMU-zero example, change the board back to the ESP8226 you are using, compile. You need to make sure the MCU-6050 is on a flat stable surface before you upload the calibration sketch which takes a while. After the calibration is done you can use the attached sketch to do the OSC business. Make sure you put in the IP address of the computer you are running Isadora on and also match up the port number which is 12345 by default.
The WiFimanager will take care of the WiFi settings, just look for a network called AutoConnectAP on your mobile phone, a window will open up, click the scan button and select the WiFi you are going to use. You can check the data sent by using the serial monitor in the Arduino IDE, just make sure the baud rate matches the Serial.begin value in the void setup loop in the sketch..in the sketch used it is 112500.
Problems
Sketch won't compile: have you installed the libraries and the ESP8226 board?
Sketch won't load: Is the board connected to your computer ( yes I have done this!)? Is the correct board selected in the Arduino IDE tools menu? Have you installed the correct driver CH340 for the USB? (https://sparks.gogo.co.nz/assets/_site_/downloads/CH34x_Install_Windows_v3_4.zip or https://github.com/adrianmihalko/ch340g-ch34g-ch34x-mac-os-x-driver ).
Getting the data into Isadora
Fire up Isadora. Goto the communications window and select set up stream, click on the auto detect option and you should see the stream appear with 6 values, it wont show the individual values. Add a Multi listener actor to the stage and select 6 as the number of channels. You'll see the MPU-6050 data streaming in. The excellent Guru session by Mark covers all this in greater and more proficient detail.
The data needs smoothing out a bit with either a smoother actor or some Java script.
That's it..now you can use the data in your show in whatever way you choose.
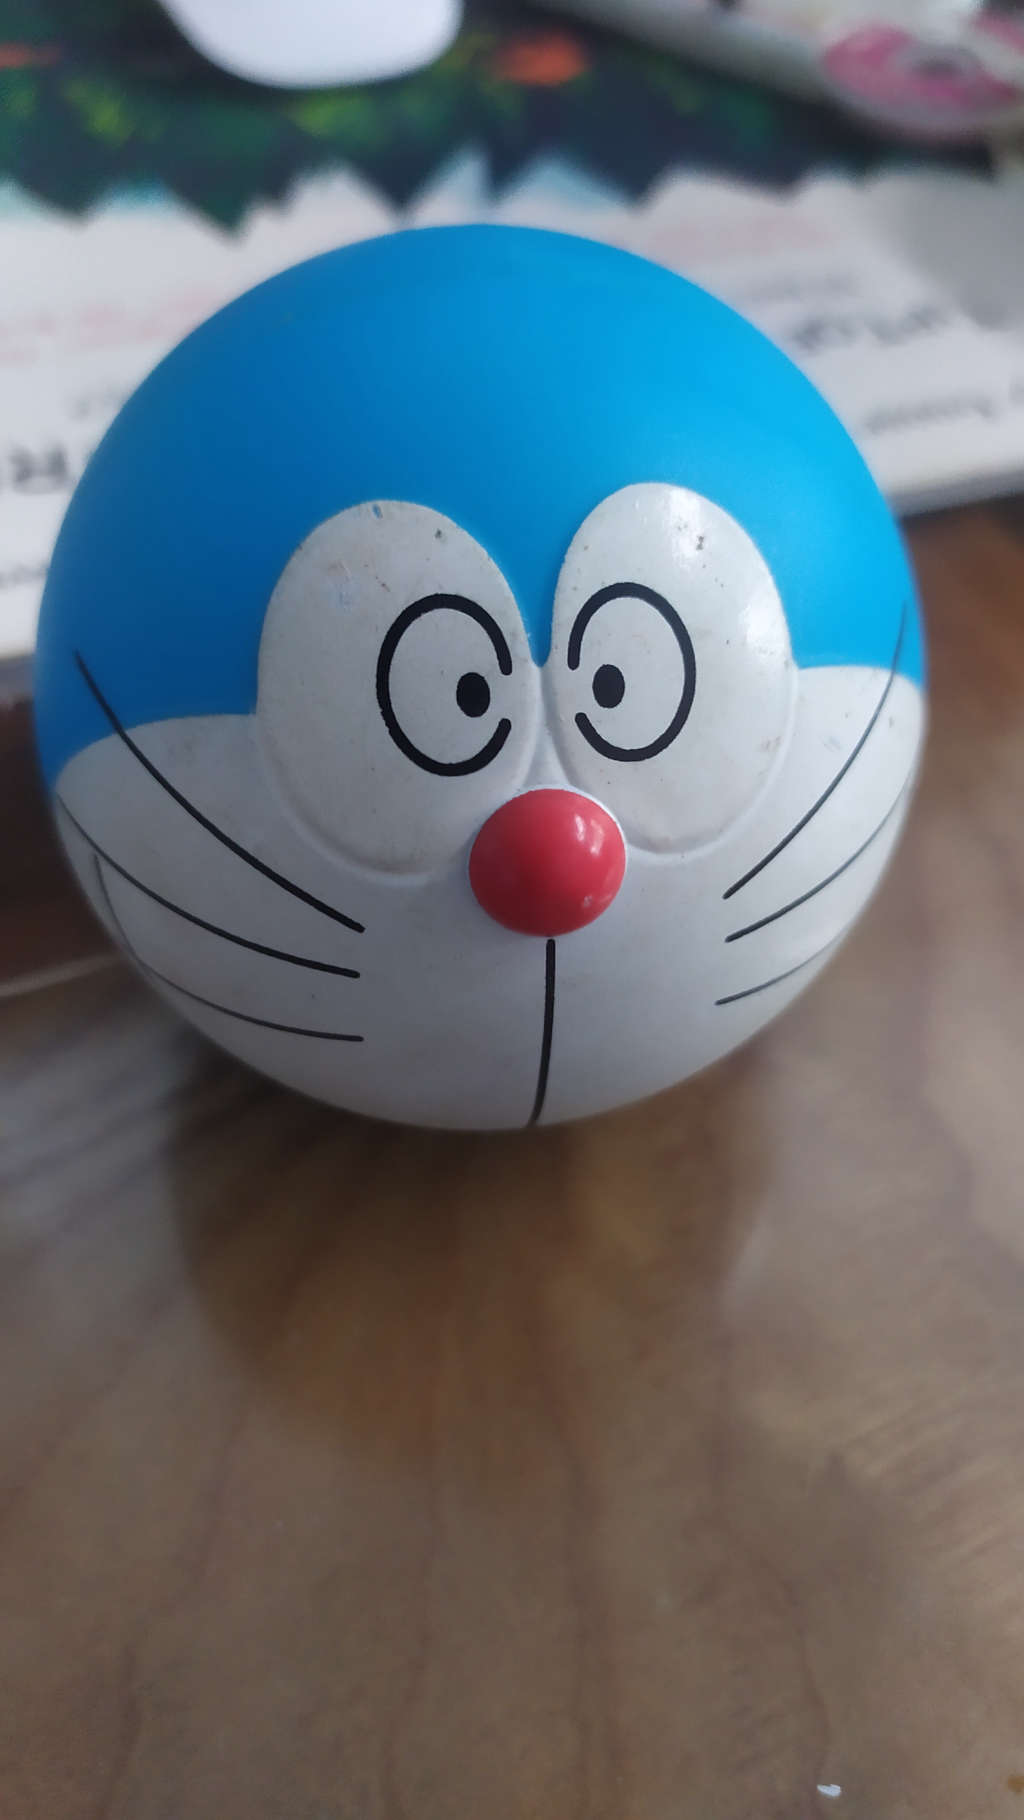
I put mine in a toy I found locally in a supermarket.
or use an esp8266 https://www.adafruit.com/products/2471 can be got even cheaper from less reputable suppliers
@dusx Understood on the posting etiquette.
Wow. Thanks for the suggestion of ESP8266.
I'm very new to the world of microcontrollers. Would you suggest I dive in, and see if I can get controllers talking to Isadora over WiFi?
@bonemap Those wearables are really something! Would your DanceDanceSense work as a pedometer, do you think?
@liminal_andy said:
$89
Thanks for providing the cost point for the Streamweaver solution. I will keep this in mind, however the currency conversion jumps the cost to over $120 per end point. That means if I was deploying over 5 devices the cost becomes significant quite quickly.
Does your solution integrate devices like Node MCU ESP32 and ESP8266 Boards?
Best Wishes
Russell
@orozcom said:
Would you suggest I dive in
Yes, you should be able to connect the device @fubbi linked, to a ESP8266 (I have been using the Huzzah), then communicate with Isadora using Art Net (this has been my approach).
Sounds like a fun project :)
NOTE: USB power-banks make for great power sources.
So personally I would use an ESP8266 for this with ArtNet. Basically what you do is get some pixels / make an enclosure (3d printing is great for this, Tinkercad is a free online browser utility that allows you to create your own enclosures. Or just buy a nice one by your local DIY electronics shop / online and modify it.)
After we done that step we need to create the Tally light symbols. Do you just want red? Great! Just put some sanded acrylic in front of it or some LEE Diffuse filters. Do you need letters? Just make your own shapes by cutting it out with a laser / handsaw out of a piece of wood or again make your shape in Tinkercad and 3d print it. (Even if you dont have access to a 3d Printer, you can order the parts online by uploading your 3d model)
Some code that I got a few years ago / modified it.
Esp8266 is looking good.