Tutorial for setting up multiple projectors and edge blending
-
Hello world,
Is there a tutorial or KB article out there that describes in simple language how to set up multiple projectors and blend their edges in order to project a single image? At its most basic using two projector projecting their output side by side so that the stage covers the entire width of their output. I would think this is a reasonably common setup in the projection mapping world?
Thanks
Mark (whose football isn't coming home) -
@mark_m said:
Is there a tutorial or KB article out there that describes in simple language how to set up multiple projectors and blend their edges in order to project a single image?
I don't know if there is a tutorial "out there" but I can say that we don't have one. And this is all going to become approximately 1 million times easier in Isadora v3. (The team are testing this blend feature as we speak.) But to try to get you going:
The basic idea goes something like this:
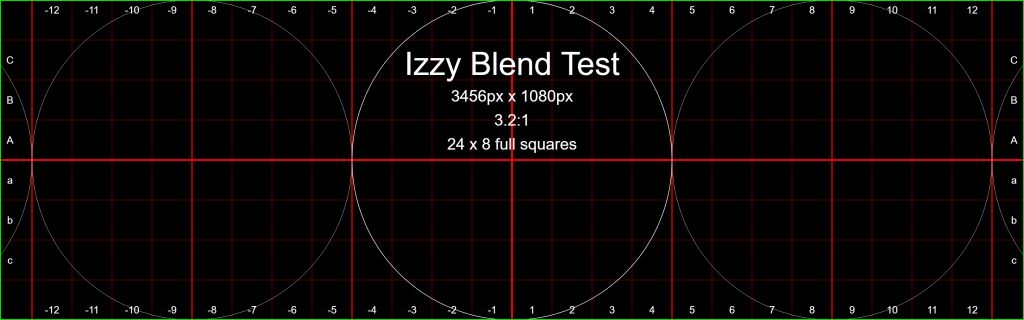
1) Define the size of the media you'll render. Let's say for this example that it will be 3456 x 1080 (i.e., 3456 = 1.8 x 1920 across, 1080 = 1 x 1080 down; the resulting aspect ratio is 3456/1080 to 1 = 3.2 to 1.)
2) Once you know this, you can calculate the overlap. If you had no overlap and two 1920x1080 screens, the total width would be 3840 x 1080. So, to calculate the overlap, take 3840 - 3456 = 384 pixels of overlap (That's 20%, which is a reasonable amount.)
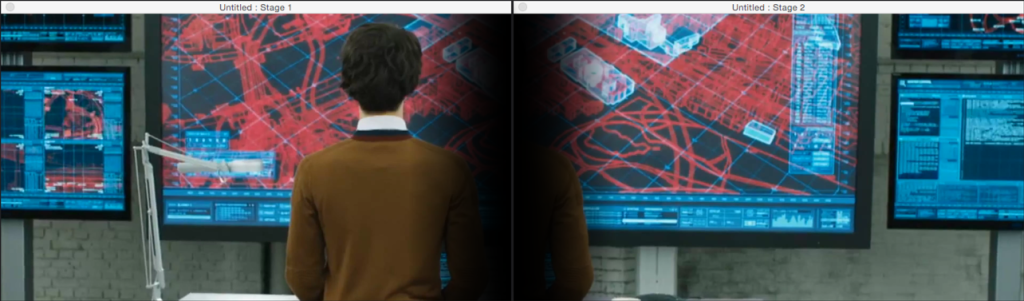
Here's a preview stage that replicates the 3.2 to 1 aspect ratio with some content in it.
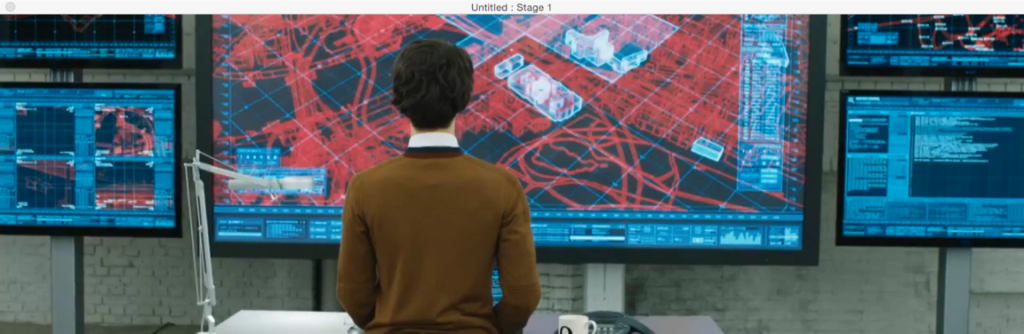
3) The next step is to split your media using Chop Pixels actors. In this example, I didn't have any 3456 x 1080 content, so I used a 4K James Bond trailer and chopped it to that size using the Chopper actor that says "Ignore Me" If you really had 3456 x 1080 content, you wouldn't need that first chopper.
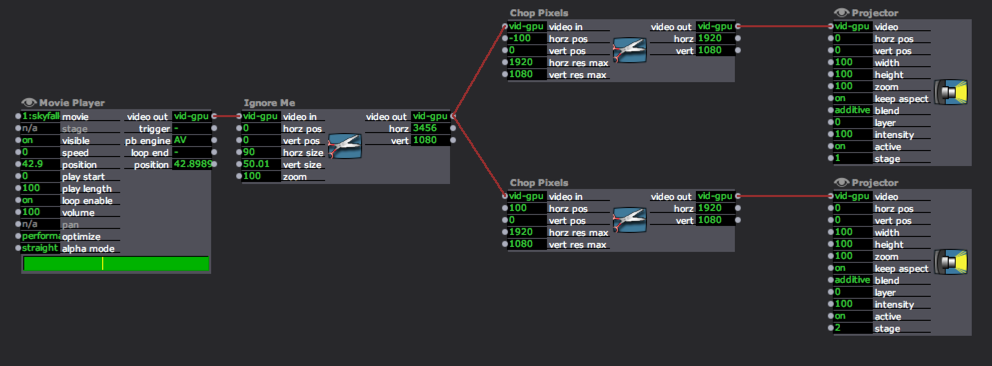
But next to that, you'll see two Chop Pixel actors, both set to a resolution of 1920x1080 -- which is the output size of your two stages. One of them is shifted all the way to the left (horz pos = -100) and the other is shifted all the way to the right (horz pos = 100.) These two images are routed to Stage 1 and Stage 2 respectively. Here's the result in the preview windows which are in the 1.77 to 1 aspect ratio so as to mimic the 1920x1080 outputs.
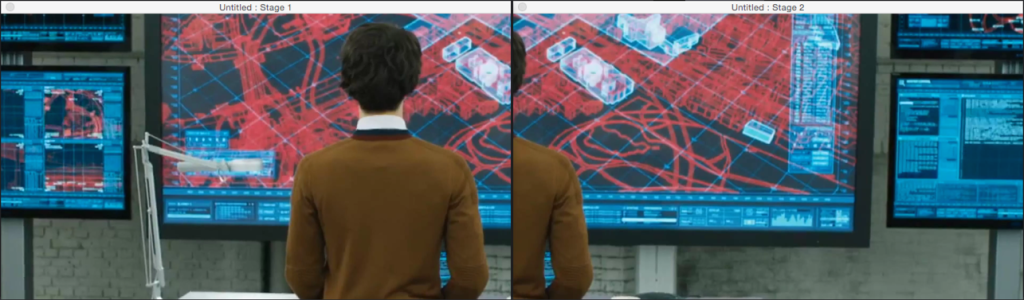
As you can see, the man's right shoulder is shown twice... that's because of the 20% overlap.
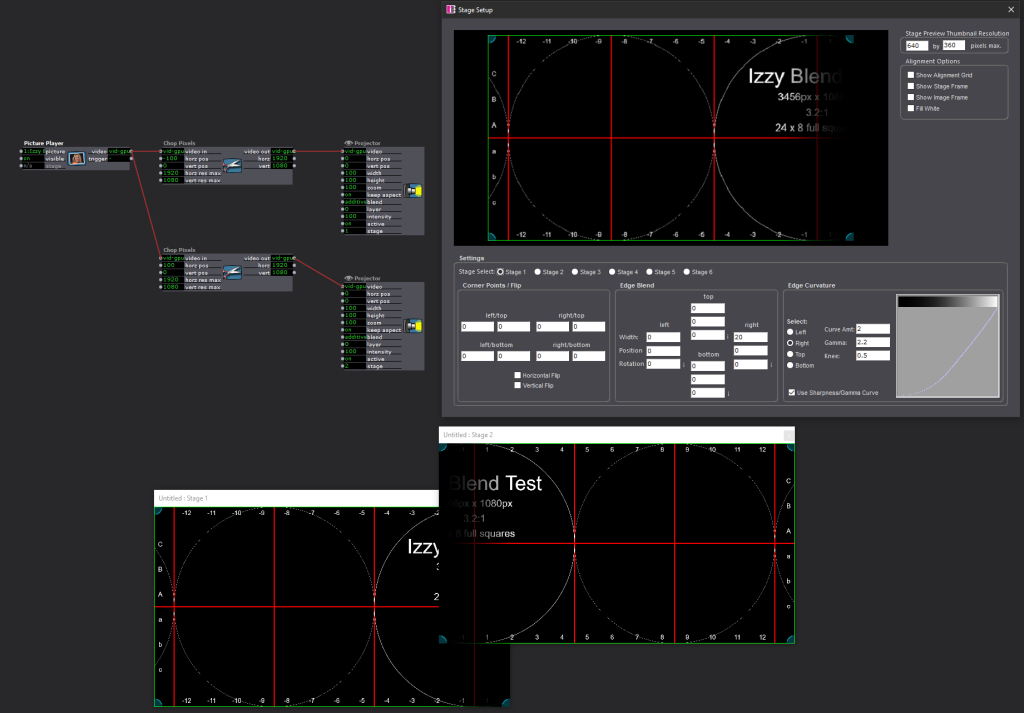
4) Now you'll need to define the blend width in the the Stage Setup window. Choose Output > Stage Setup and select Stage 1 using the radio buttons near "Stage Select". Then, set the blend width along the right edge to 20%.
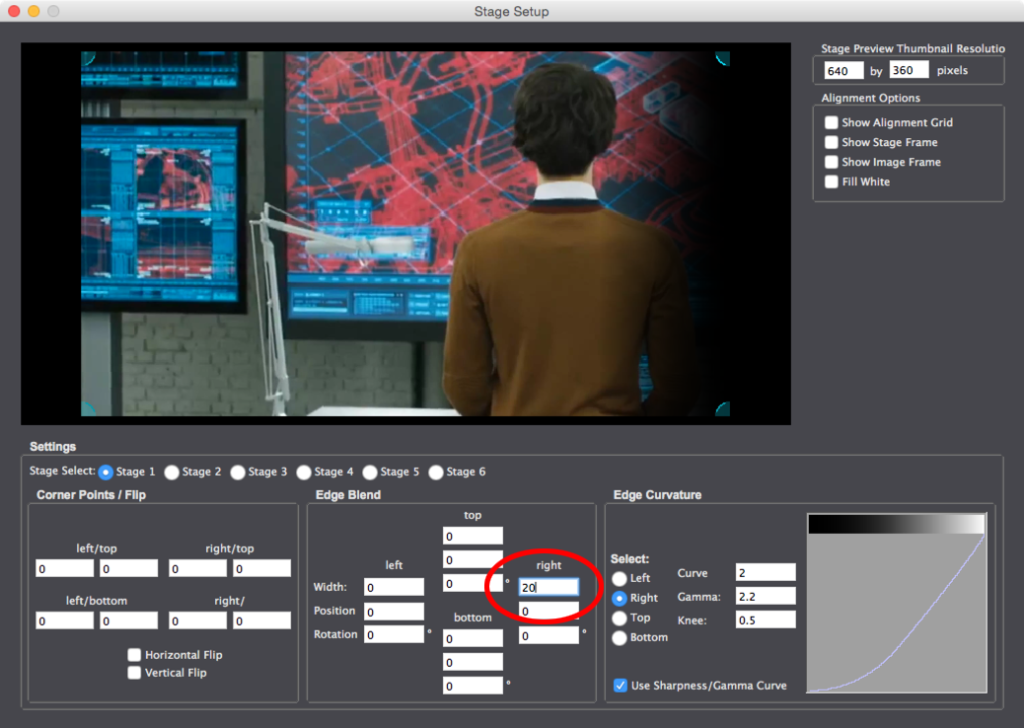
Now select Stage 2 and set the left blend width to 20%. You'll end up with your outputs looking like this.
5) I can't do the last bit using the previews, but that entails lining up your projectors to get that 20% overlap. Since this part involves the physical world, it can always be a bit tricky to accomplish this if you don't have a good system to adjust your projector position. I'll leave that bit up to you. ;-)
In any case, that's by no means a exhaustive tutorial. But hopefully that makes the steps you need to take clear, and you can take it from here.Let me know if you need any clarifications.
Best Wishes,
MarkMedia Artist & Creator of Isadora
Macintosh SE-30, 32 Mb RAM, MacOS 7.6, Dual Floppy Drives -
The Most important part is knowing your dimensions.
example, blending two 1920x1080 projectors with a 20% blend, will give you a 3456x1080 canvas. (3456 = 2 x 1920 - (1920 x 0.2))
Then in Stage Setup, you need to set each Display (in this case 1 and 2) to have a 20% blend on the right or left depending on placement.
In the example image above, I have an Image that is the full output size of 3456 x 1080.
I Chop the left 1920x1080 to use with Stage 1, and Chop the right 1920x1080 to use with Stage 2.
In Stage Setup, you have lots of fine control over the Edge Curvature,
but I suggest working with the Defaults until you have it about perfect, then you may want to make some minor tweaks if needed. -
Looks like Mark, beat me to it, while I captured some images :)
-
@mark said:
But hopefully that makes the steps you need to take clear, and you can take it from here.
Hi Mark, @DusX ,
Thank you both very much: those are the very steps I needed, and very clear indeed. Really appreciate your time to walk me through it.
And makes me even more excited about Isadora 3 :-)
Cheers
MarkIntel NUC8i7HVK Hades Canyon VR Gaming NUC, i7-8809G w/ Radeon RX Vega M GH 4GB Graphics, 32GB RAM, 2 x NVMe SSD
Gigabyte Aero 15 OLED XD. Intel Core i7-11800H, NVidia RTX3070, 32GB RAM 2 x NVMe SSD
PC Specialist Desktop: i9-14900K, RTX5080, 64GB RAM, Win11Pro
www.natalieinsideout.com -
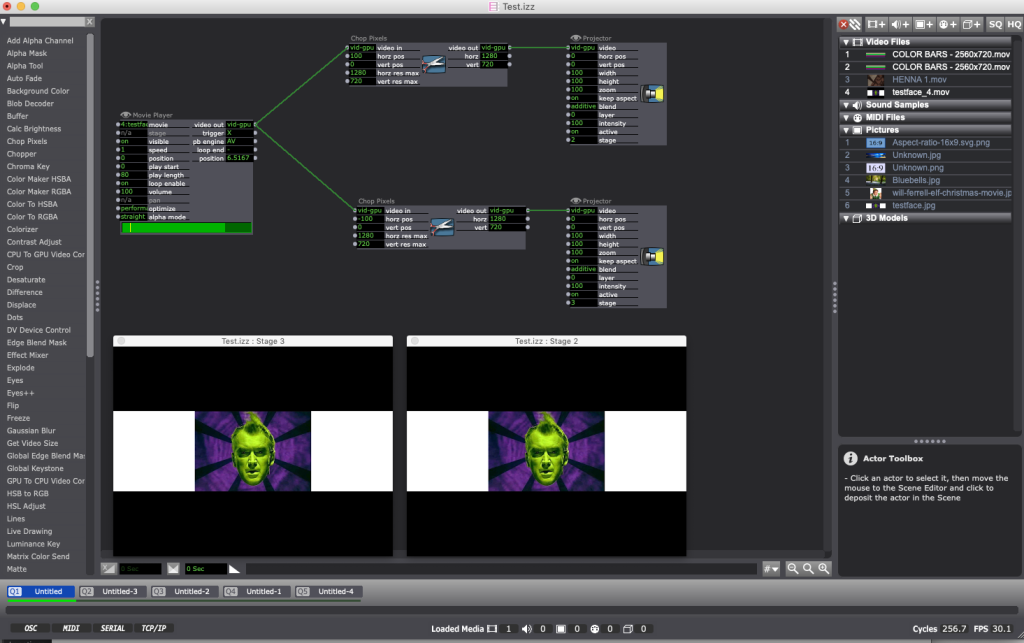
Working with this method on a machine with Izzy 2.6.1 (can't upgrade in this scenario even though my personal machines are on Izzy 3), and trying to blend two projectors using the chop pixels actor. But it won't chop... Original files in this pic are 2560x720, which we're chopping to half - 1280 x 720 (we'll add a calculation for overlap later, and we're just trying to troubleshoot the actor to see if it will chop... but it doesn't seem to... can you if we're doing something wrong here?
Media artist (video designer for theatre and filmmaker) based in Toronto, Canada. Coach and instructor at The National Theatre School of Canada. Instructor at Sheridan College in Interaction Design and York/Sheridan Bachelors of Design. BFA Emily Carr University, MFA York University. 2.9 GHz Intel Core i7 MBP, 16 GB RAM, Radeon Pro 460, 4096 VRAM, running OSX 10.12.6, Isadora Core 2.6.1, and 2.3 GHz Intel Core i7 MBP, 16 GB RAM, running OSX 10.13.1 (High Sierra), Isadora Core 2.6.1
-
rollover the links leading to the Chop Pixels actor, and make sure that the thumbnail shows the image to be larger than the 1280x720 you have set as a target size.
Perhaps you are getting a scaled image due to your preferences. Switch between Stage Preview and Stage Full, as this may change the scaling also.