Help with Importing Pictures
-
Any help will be much appreciated.
Complete newbie so please excuse lack of knowledge.
Apparently the projector is 4:3 1024x768.
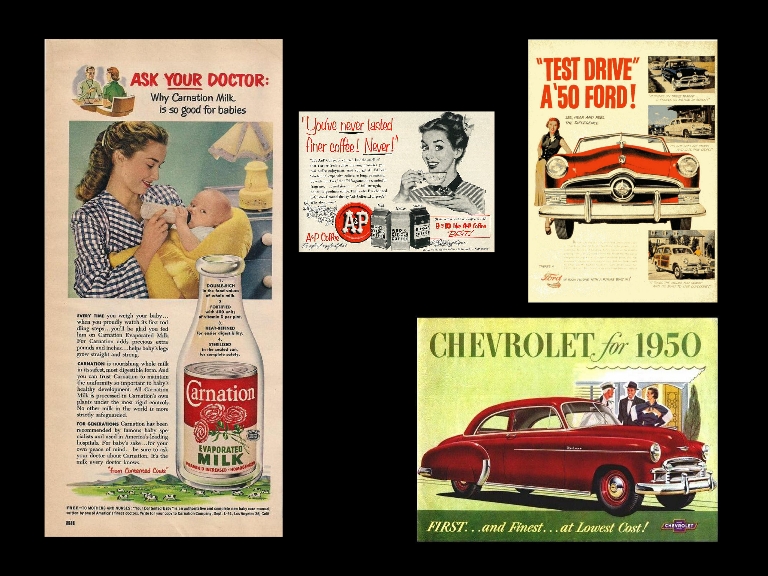
I have the stage size set to 1024x768. If I have a very simple scene containing 4 jpeg’s, do I have to make
them all the same size or can I import different sizes? (see photo). I have been informed that they all need
to be 1024x768… which means I will have to create .png’s with transparent backgrounds to achieve the same
result?........ Could someone please clarify?
Hope it all makes sense!
Many thanks,
Wild Bill
-
hi there,
As far as I know, when working with still images, you can combine multiple resolutions. If the native resolution is 1024x768 I’d resize them so they fit horizontally or vertically (i.e. landscape at 1024 width and portrait at 768 height). Make sure to use resolution of 72 pixels per inch. Using the ‘zoom’ and ‘hor pos’ and ‘vert pos’ in the projector actor you can compose the projected image the way you want.No need to use png and/or alpha channels, regular jpg will be fine.
Hope this helps
Cheers!
-
If you build the stills with an embedded alpha and make the background layer black or whatever, Izzy will cut out for the picture no matter the size.
-
This >>>Isadora Patch + Read Me<<< might save you a bit of headache (under certain circumstances).
(Please forgive me if I cover things you already know, I just want to make sure that this is thoroughly explained so as to ensure that it is accessible to Isadora users of all skill levels.)
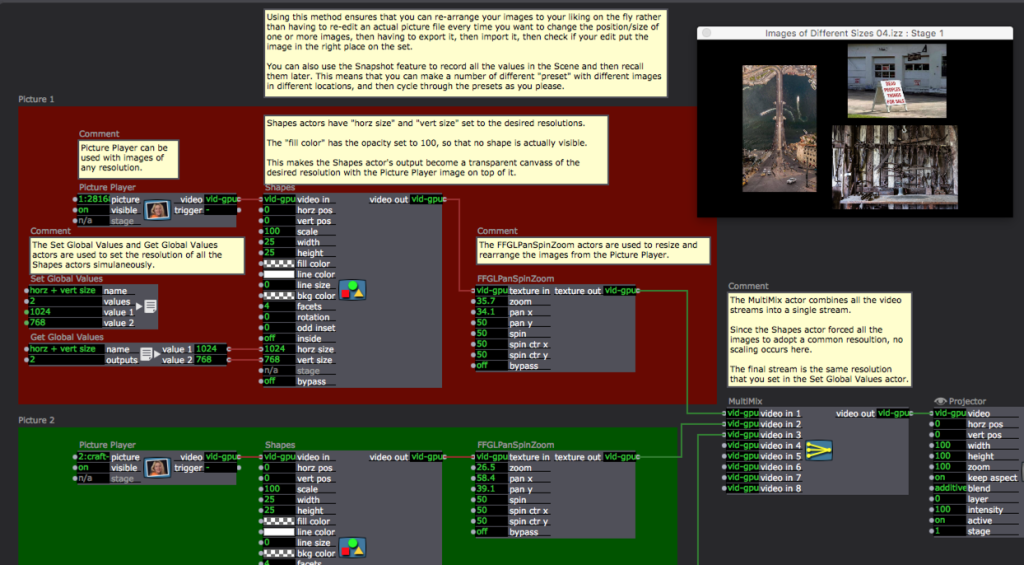
In the first Scene the Patch uses the Shapes actor to create a transparent background of the desired resolution, then uses a FFGLPanSpinZoom actor to reposition the original picture which is overlaid onto the transparent background, and finally all the video feeds are combined in a MultiMix actor (which does not scale them because the Shapes actors forced everything to be the same resolution).
The first Scene of the Patch
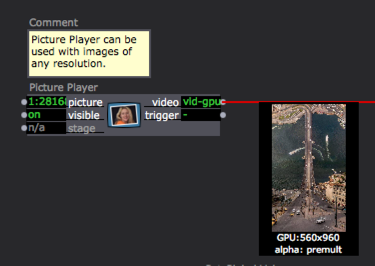
The Picture Player actor (with a strange resolution image)
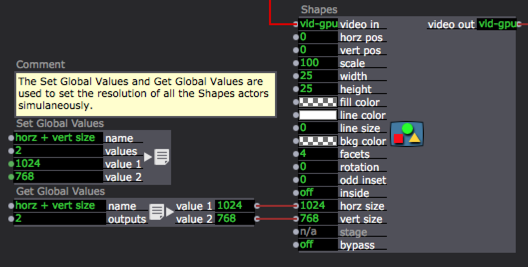
The Set and Get Global Values actors
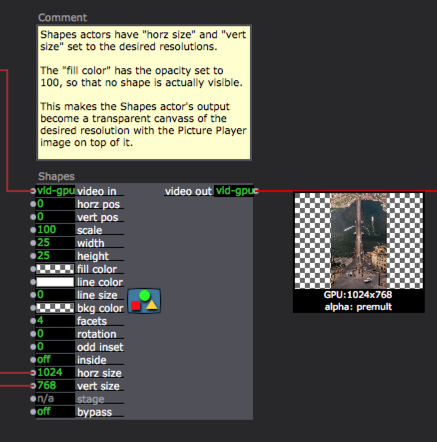
The Shapes actor (outputting a standardized resolution)

The FFGLPanSpinZoom actor
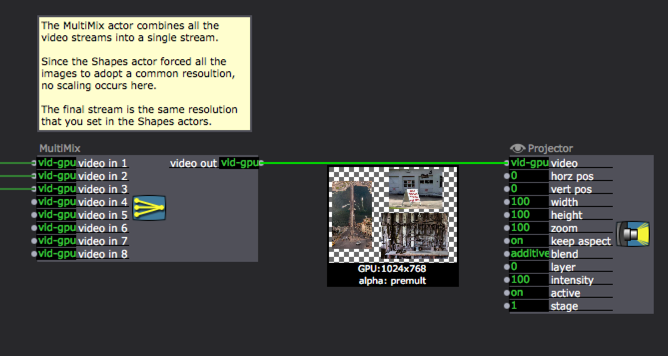
The MultiMix actor
Using this method ensures that you can re-arrange your images to your liking on the fly rather than having to re-edit an actual picture file every time you want to change the position/size of one or more images, then having to export it, then import it, then check if your edit put the image in the right place on the set.
You can also use the Snapshot feature to record all the values in the Scene and then recall them later. This means that you can make a number of different "preset" with different images in different locations, and then cycle through the presets as you please.
The Patch's second Scene has a User Actor that contains the setup with the Picture Player, Shapes, and FFGLPanSpinZoom actors. If you do not wish to use it, just copy the programming in the first Scene and use that instead.
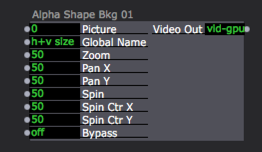
The included User Actor
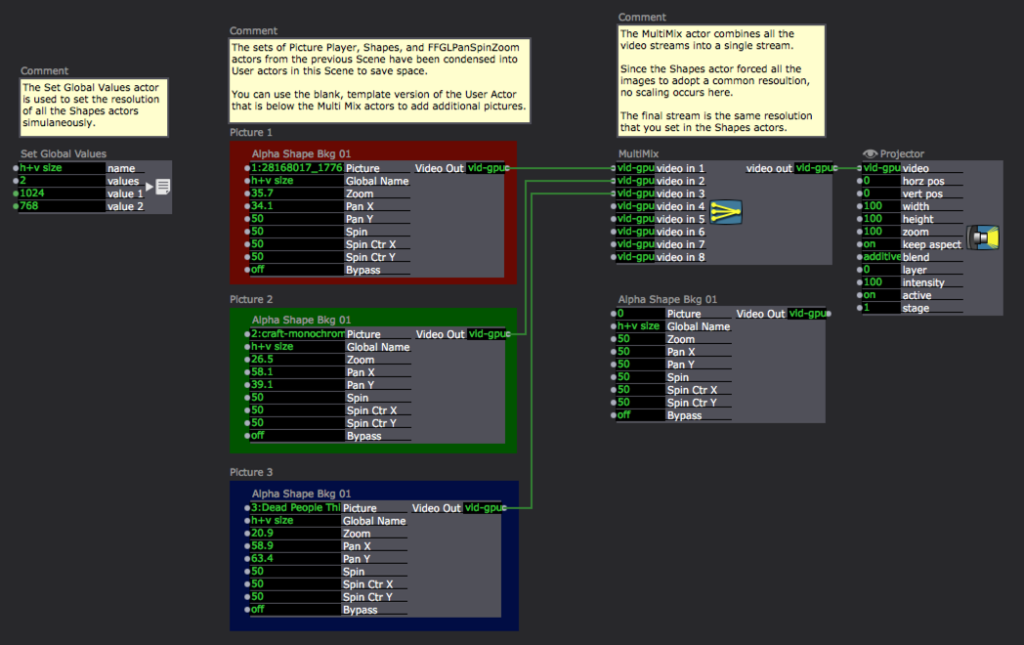
The Second Scene of the Isadora Patch
USING THE INCLUDED USER ACTOR:
If you want to use the User Actor, add it to your Global User Actor Folder (I keep mine on my desktop). To do this, copy the User Actor "Alpha Shape Bkg 01.iua" from the folder "Images of Different Sizes", (which is created when you decompress the file "Images of Different Sizes.zip") and place it in your Global User Actor Folder. (If you do not have a User Actor folder, simply create a folder on your desktop and name it "User Actors".)
SETTING THE GLOBAL USER ACTORS FOLDER:
If you have not set the Global User Actor Folder before, you can do that by opening Isadora then clicking Actors > Set Global User Actor Folder, then using the resulting file dialog to select the folder you want to use. (If you do not have a Global User Actor Folder, you can create one by pressing the "New Folder" button at the bottom left of the file dialog.) Once you've set the Global User Actor Folder, close Isadora, then reopen it. At this point, you should see any User Actors/Macros that you put into the Global User Actor Folder in the User Actors folder in the top left of the Toolbox.
The User Actors folder in the top left of the Toolbox (it's the one shaped like a person).
“Save User Actor/Macro”
Any User Actors/Macros that you put into this folder while Isadora is open, or save to this folder by right-clicking on the User Actor/Macro and selecting "Save User Actor/Macro" while Isadora is open, will only show up if you close and reopen Isadora.
“User Actor/Macro to Global Toolbox”
Note: You can right click on a User Actor/Macro while Isadora is open and select "User Actor/Macro to Global Toolbox" which will make it appear immediately in the User Actor section of the Toolbox as well as adding it to the Global User Actor Folder.
“User Actor/Macro to Document Toolbox”
You can also right click on a User Actor/Macro while Isadora is open and select "User Actor/Macro to Document Toolbox" which will make it appear immediately in the User Actor section of the Toolbox but will *NOT* add it to the Global User Actor Folder.
Best wishes,
Woland
-
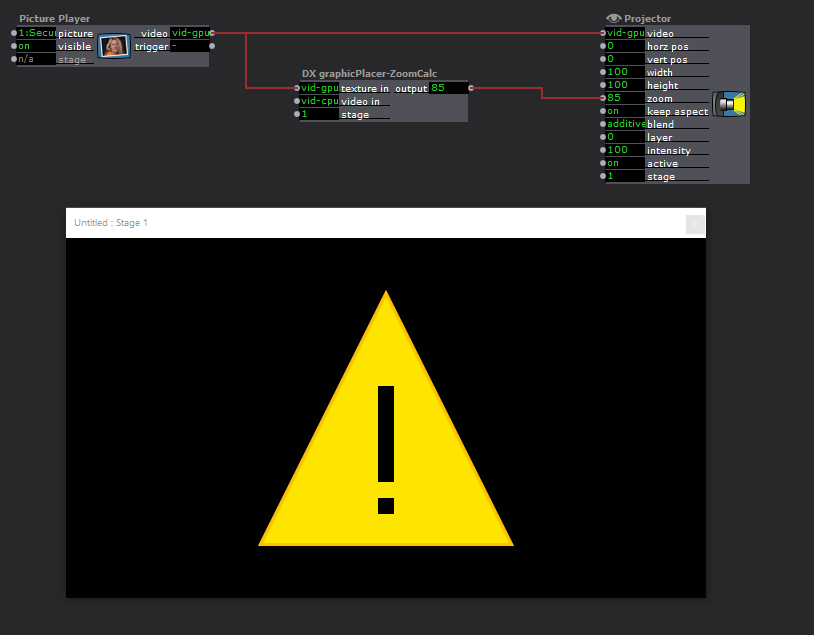
You can use the attached User Actor to determine the zoom required to display an image at 'native' size.
It looks at the Stage (must match the projector) and the image size to determine the zoom level.usage: (must be used for each image / projector pair)
-
Hi Woland,
I’m a complete novice as far as Isadora is concerned. I can perform a few basics like adding a picture player and movie player but that’s about it! I think I have an awful long way to go yet!
Thank you so much for this information. The patch didn’t have the photos included but I just imported some of my own and I could see how it all worked.
The production I’m helping out with has around 150/200 images and circa 30 videos over a number of scenes. Would it be easier, and quicker, to adapt all of the jpeg/png images to 1024x768 including (transparent backgrounds where necessary) prior to importing into Isadora or to use the method you have shown in the patch? I’m assuming whichever method is used the final size of the images needs to be 1024x768?
Thank you once again and I look forward to your reply.
All the best,
Wild Bill
-
-
@bartvang
Thanks very much for this info. Combined with the other replies it has been very useful. I'm a complete novice to Isadora so it all helps!
All the best,
Wild Bill
-
-
@wild-bill said:
The production I’m helping out with has around 150/200 images and circa 30 videos
If it's that many photos you may want to just go the route of editing. I have a penchant for wanting flexibility and often try to solve things like this programmatically (assuming there's a reason to do so).
If it was only a handful of images you were using, then my method would allow you a lot of flexibility in terms of being able to re-arrange your images on the fly while looking at the video output to make sure they were ending up where you wanted them on the set. However, with so many images, it's probably not a sustainable solution.
Best wishes,
Woland