[SOLVED] Text Borders?
-
Hello Again,
As I dive deeper and deeper into the wonderful world of Isadora, I have many different ideas on how I may be able to use to save time, drive space, and open up some flexibility in content creation for some shows I am doing. One idea has been to take the intro credits of a show that was created in Premiere Pro and instead of changing the text in Premiere for each show, rendering the file and then playing it in Isadora; I could create a blank file and use text generation in Isadora, timed to Movie Player positions to do the same thing. This means only having to change the text field in Isadora for each show that needs it and not render a new file. It would also be nice for last minute changes pre show and not have to stress render a file. I am pretty close to getting what I like, I have my fonts working in Isadora I just would like to create a nicer border around the fonts.
Here is a screenshot of my rendered video with an Isadora Text draw overlaid. The Text draw overlay is solid white while the render version has a nice border to the text that helps it stand out. Premiere has a nice control for adding borders easily but I cannot seem to recreate this Isadora?
I have tried to do a second layer zoomed/stretched, using Edge Detection (got the closest but still looked wonky) and Matte actors but I cannot get any where near as nice looking as the render.
I know as an alternate I can create the text in photoshop and control it as an image in Isadora but that would be a lot of images for each credit I wish to use. Text actors would be ideal here. The text looks great minus the border so hoping there is a way to easily add a border that I am missing.
As always I greatly appreciate any idea put forth by this great community.
12 core Ryzen 3900x, ASUS ROG Strix E x570, 64gb G skill Trident Z Royal RAM, RTX2070 Super GPU, Samsung 970EVO Plus M2 1gb + 12 core MacPro 2013, 64gb RAM
-
@dustinboyle I'm honestly not quite sure what you're asking for, but a simple border could be easily made with the shapes actor.
Hope this helps!
Hugh
Hugh in Winnipeg - All test machines, Win11 Pro, 64 bit, OS SSD and separate data SSD.
Dell 7560, i9 11950H, 64 gigs, NVIDIA RTX A4000 w/8 GB GDDR6 -
@citizenjoe Not quite what I am looking for. I am looking to add a border around the letters themselves. If you look at the picture I linked you can see the black text with the white border around the letters. That is what I am trying to achieve.

*Edit because I can see now how to link in pictures.
The top row of text is rendered from Premiere and is how I would like the end result to appear.
The bottom row is an Isadora Text Draw actor on top of the rendered file. If I could make the Isadora text match the rendered text life would be grand. =)
12 core Ryzen 3900x, ASUS ROG Strix E x570, 64gb G skill Trident Z Royal RAM, RTX2070 Super GPU, Samsung 970EVO Plus M2 1gb + 12 core MacPro 2013, 64gb RAM
-
@dustinboyle Now I get it. I'm guessing that this isn't what you want, but I'd go the simple route and just use a font that does that:
https://www.1001freefonts.com/...
Cheers,
Hugh
-
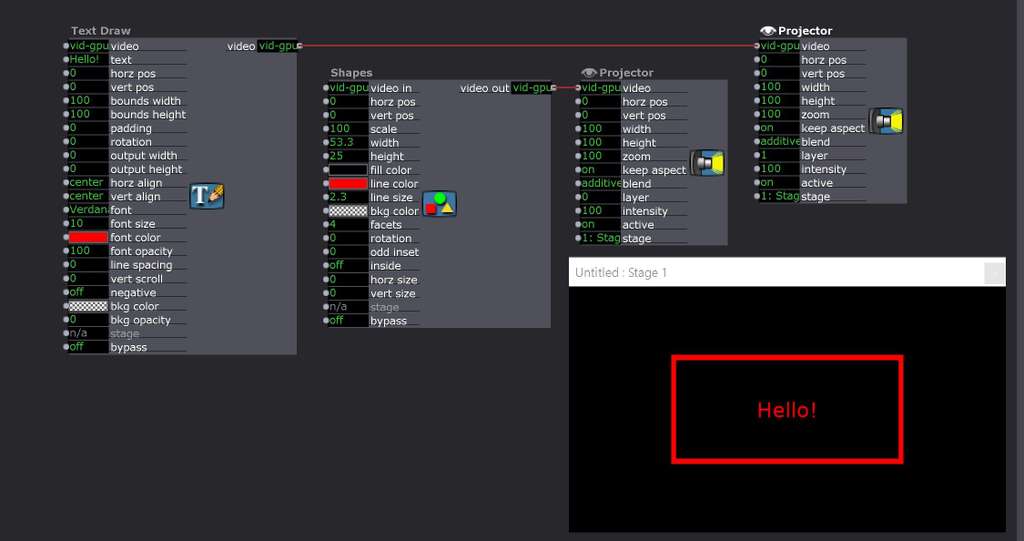
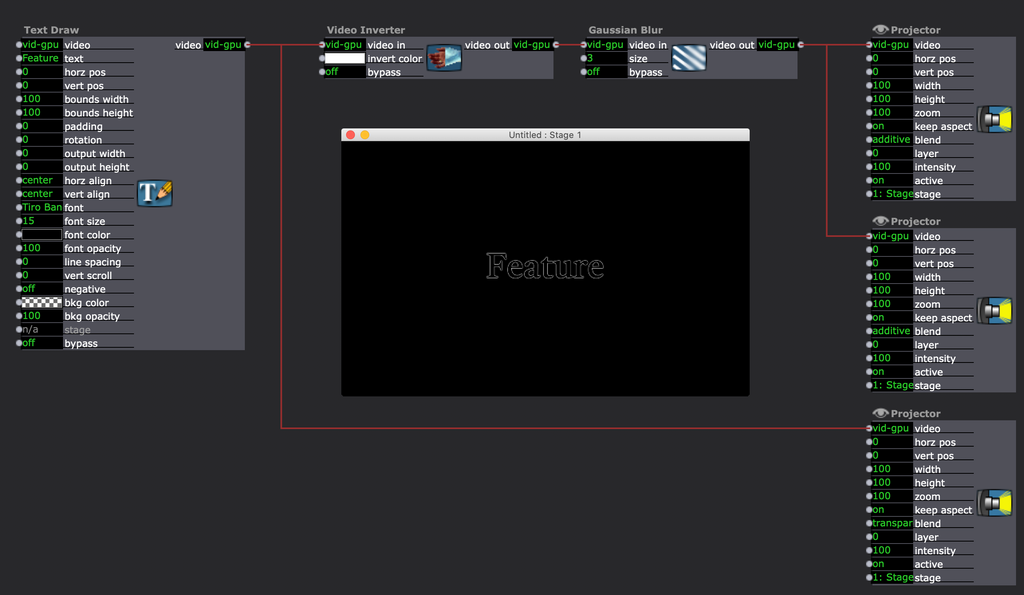
This is the closest I can get with a text outline. Be aware that the blend mode from the lower projector has to be set to transparent.
-
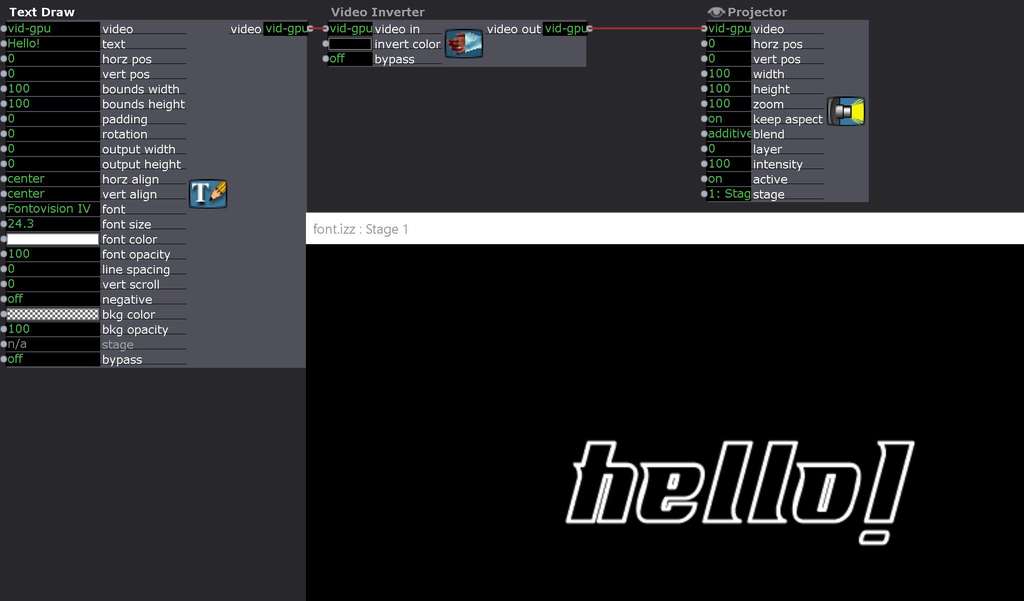
Another version to get cleaner edges, lower the blur and add another projector that is set to blend mode additive. Its not so good visible in the screenshot but works fine fullscreen.
Michel Weber | www.filmprojekt.ch | rMBP (2019) i9, 16gig, AMD 5500M 8 GB, OS X 10.15 | located in Winterthur Switzerland.
-
@michel Wow cool, Thank you, this looks pretty slick when I try it on my own. So far this is the best result I have seen yet. It would be cool to be able to get the border a little thicker and maybe if I play with this method some I could figure it out. But either way I think I can work with this method and be happy with the results. I really appreciate you taking the time to work this out.
Hoping to see other ideas as well, if nothing else to learn more about how to use this software as creatively as possible. =)
12 core Ryzen 3900x, ASUS ROG Strix E x570, 64gb G skill Trident Z Royal RAM, RTX2070 Super GPU, Samsung 970EVO Plus M2 1gb + 12 core MacPro 2013, 64gb RAM
-
Media Artist & Teacher
MacBook Pro, Apple M3 Max, 128 GB
Sonoma 15.7.2 -
-
@aolis I had tried that exact actor in my initial experiments, I was not able to get clean lines and it looked very sloppy overall compared to the rendered text. No settings seemed to provide the results I was after. The blur method gets much closer but is still about 95% of want I am after from the premiere render. I do appreciate the input though. =)
12 core Ryzen 3900x, ASUS ROG Strix E x570, 64gb G skill Trident Z Royal RAM, RTX2070 Super GPU, Samsung 970EVO Plus M2 1gb + 12 core MacPro 2013, 64gb RAM
-
@dustinboyle said:
I had tried that exact actor in my initial experiments
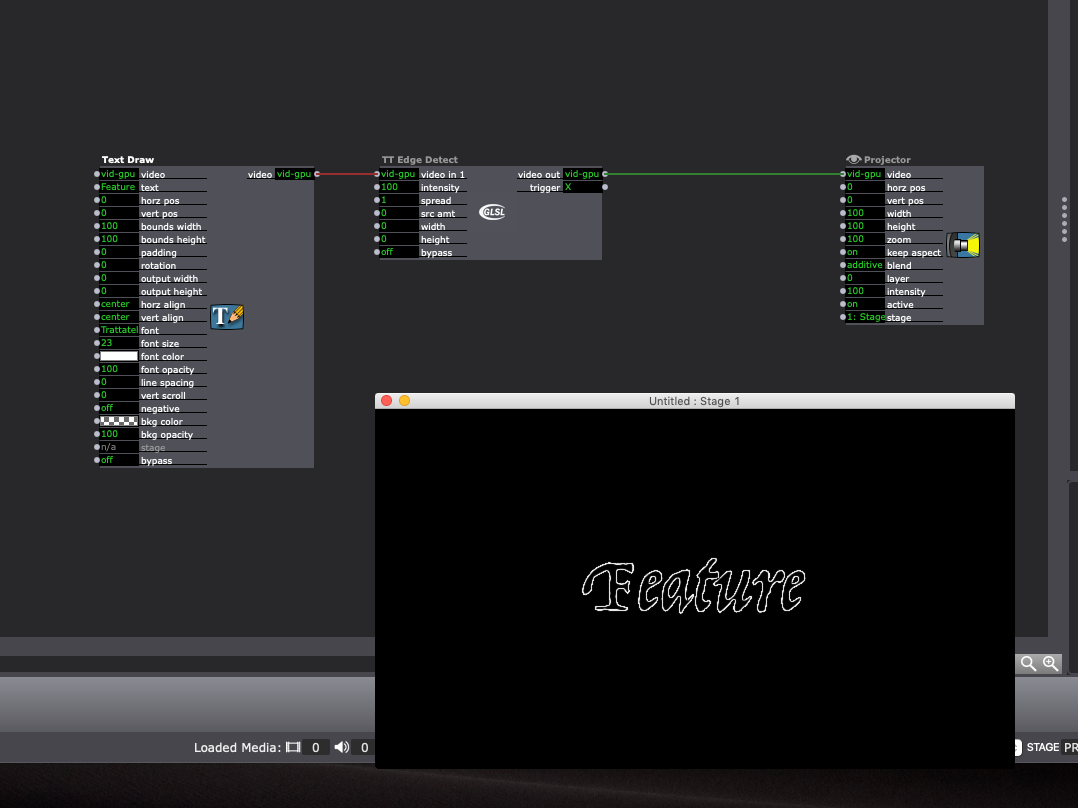
There is an older, 'The Edge' actor (cpu video only) that will give you much more chunky outlines, while the 'TT Edge Detect' actor is available as part of the official Troikatronix GLSLShader bundle and produces much cleaner edges.
One trick that will help ensure you get clean edges is to enter a resolution into the 'Text Draw' actor, by adjusting the 'output width' and 'output height' inputs as needed. Otherwise the default set in preferences will be used, and it's rather low. I will often use a 'Get Stage Size' actor to feed the values into resolution inputs like these, as a way to make the patch auto-adjust to changing display setups.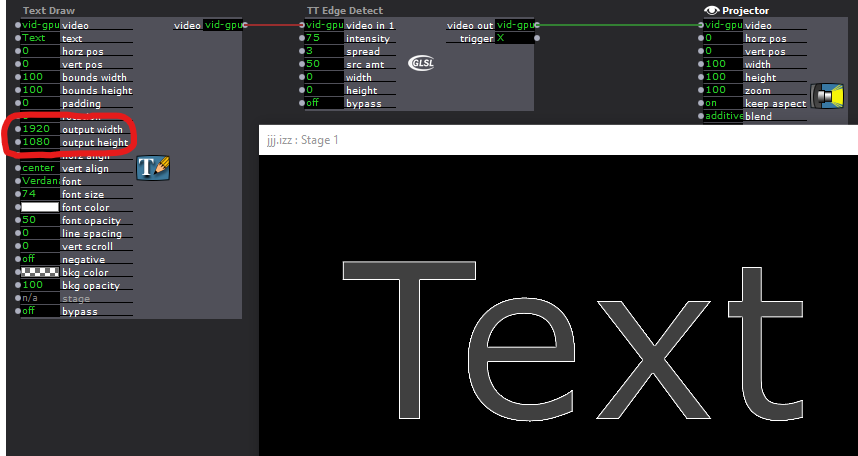
-
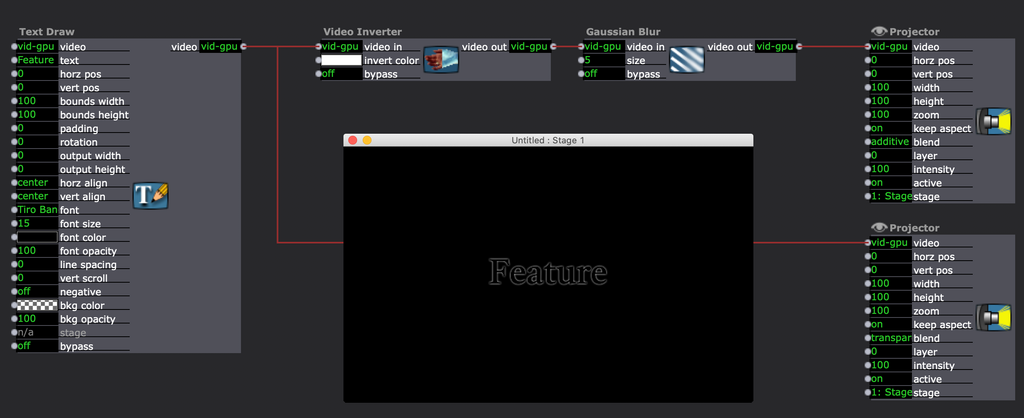
as @DusX says it definitely helps setting the output width and height to full hd, also for my suggestion above. And if you add a third projector on top with the blend setting to additive you can higher the blur size to 4 or even 5.
Best Michel
-
And a new version with only 2 Projectors but adding the "TT Sorbel Edge Detection". Very good control of the thickness.
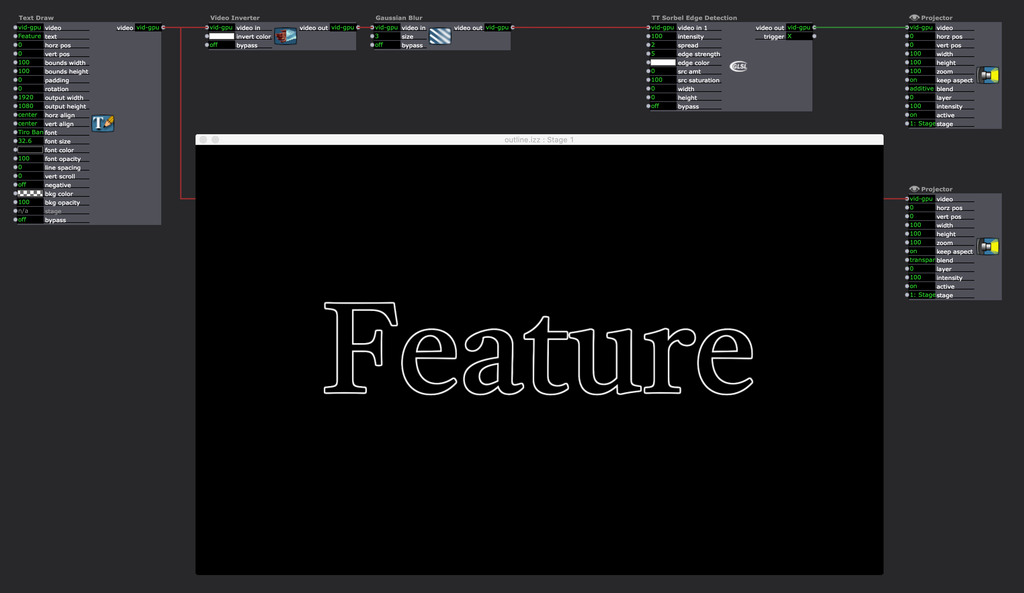
-
Michel Weber | www.filmprojekt.ch | rMBP (2019) i9, 16gig, AMD 5500M 8 GB, OS X 10.15 | located in Winterthur Switzerland.
-
@michel Very nice, I think you hit the nail on the head here. I do see that changing the Output Width/Height does make a big difference even in the Plain TT Edge Detection actor. I was not doing that before but now see how it likes to operate. This latest method is most certainly the cleanest I have seen yet and will become a staple in my productions. I can't thank you enough for taking the time to work this out. This will save a great deal of time and drive space from not having to render each intro in premiere pro.
I do very much like the blur method as well the more I play with it. I have been able to achieve a very cool glow effect that will work in some areas very nicely. My thanks to everyone who chimed in with their ideas. You have helped me gain a deeper understanding of this software. -
On a related point, I used to make great use of a plugin shared on the forum years ago called 'ReadTextFromFile' or something very similar to that. I can't remember who shared it originally but it was great. It allowed you to read a plain-text file line by line, so was perfect for titles, captions, etc and you could edit the text in a text friendly package that could be easily shared with writers/directors etc.
I guess now that work flow could be replicated with the Data Array actor. You could also use it to record and recall other settings, such as font size, colour, position all stored in the same tab-seperated text file. The file could be easily shared and edited by other people as well.