[ANSWERED] Izzy Map with curved screens
-
Hi all. I have a curved screen with multiple shapes inside the main curved screen. I'm trying to find the best way to achieve this. Does anyone have any thoughts?
-
@jamie-nesbitt said:
<p>Hi all. I have a curved screen with multiple shapes inside the main curved screen. I'm trying to find the best way to achieve this. Does anyone have any thoughts? </p>
Is there a way to create bezier points in the output of izzy map much like you do in the input?
-
@jamie-nesbitt Hi there, yes if you create a new grid mapping in the output section and check the curved box in the paths option that should give you some options that may help. Adjusting the grid options layout and the granularity will give you more control, also :)
-
@leben thanks for replying. The grid is awesome. The issues Im running into now is that I would like to cut out shapes within the warped grid layer. is that possible? When I add a composite layer it doesn't retain any of the grid warping information.
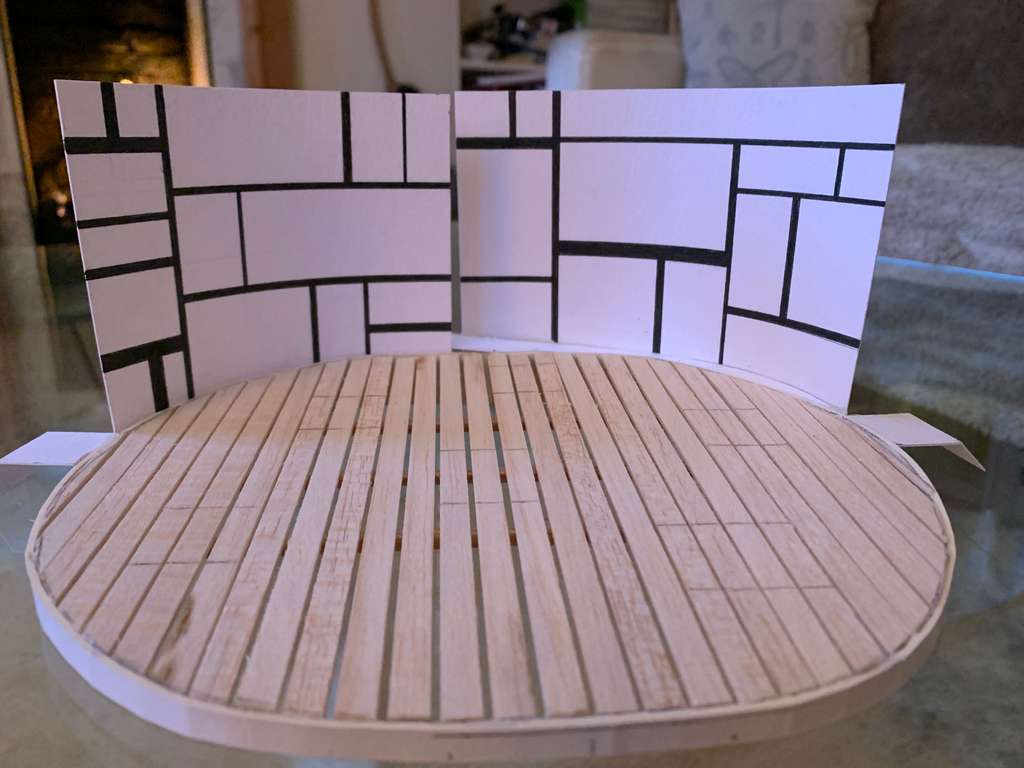
Ultimately, I'm trying to render one file prior to mapping, then warp that file to match the curve, then cut out individual shapes, from the curved file, so I can place them inside actual shapes of the curved screen.
here's the image of the set if that doesn't make sense.
-
@jamie-nesbitt said:
When I add a composite layer it doesn't retain any of the grid warping information.
Yes, because those two IzzyMap Slices are entirely separate. Slices that intersect each other only interact in terms of blend mode (additive, transparent, opaque). Non-Grid Slices can't use the properties of a Grid Slice.
@jamie-nesbitt said:
Ultimately, I'm trying to render one file prior to mapping, then warp that file to match the curve, then cut out individual shapes, from the curved file, so I can place them inside actual shapes of the curved screen. here's the image of the set if that doesn't make sense
This is going to be tricky.
- Use one Projector to do the Composite Mapping Slices with the different shaped cutouts
- Send that to a Virtual Stage
- Use the Get Stage Image actor to grab the image from the Virtual Stage and pump it into a second Projector with a Grid Map Slice to warp your output.
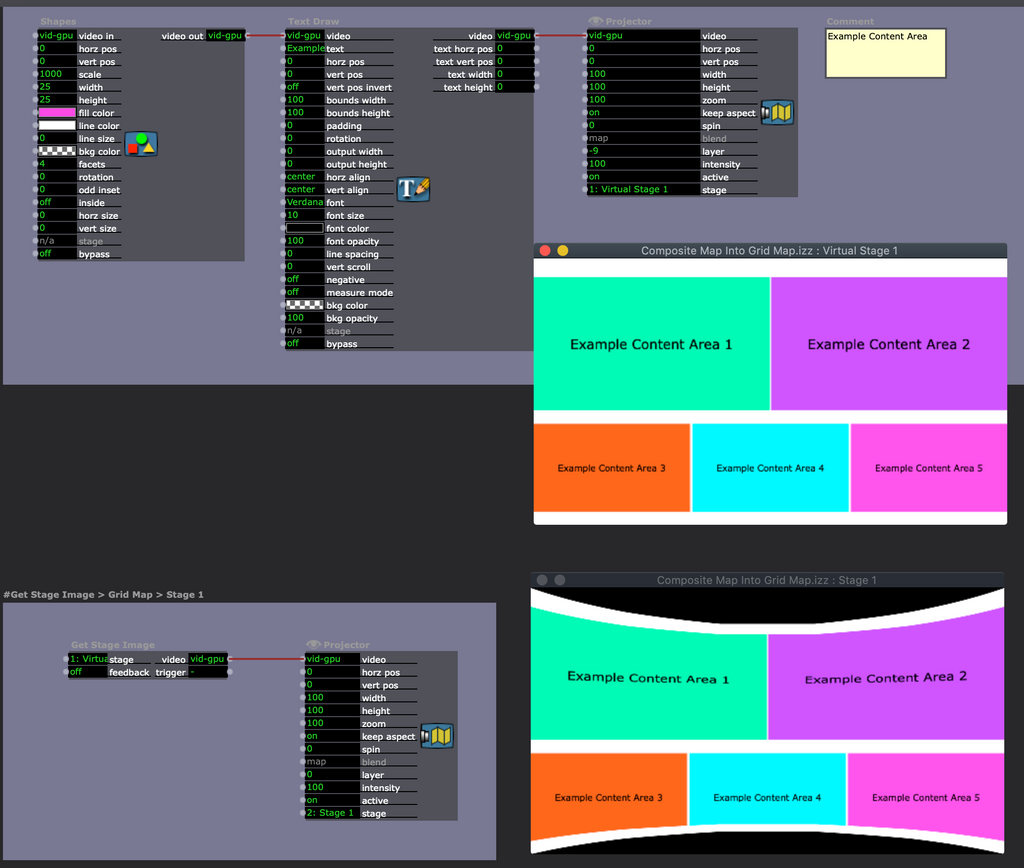
Here's an example file of that: composite-map-into-grid-map.izz
(I know that the curve I put in using the Grip Slice is nonsense, I just wanted to demonstrate that this can be done and wasn't trying to make a mapping that would work perfectly for your setup or anything.)
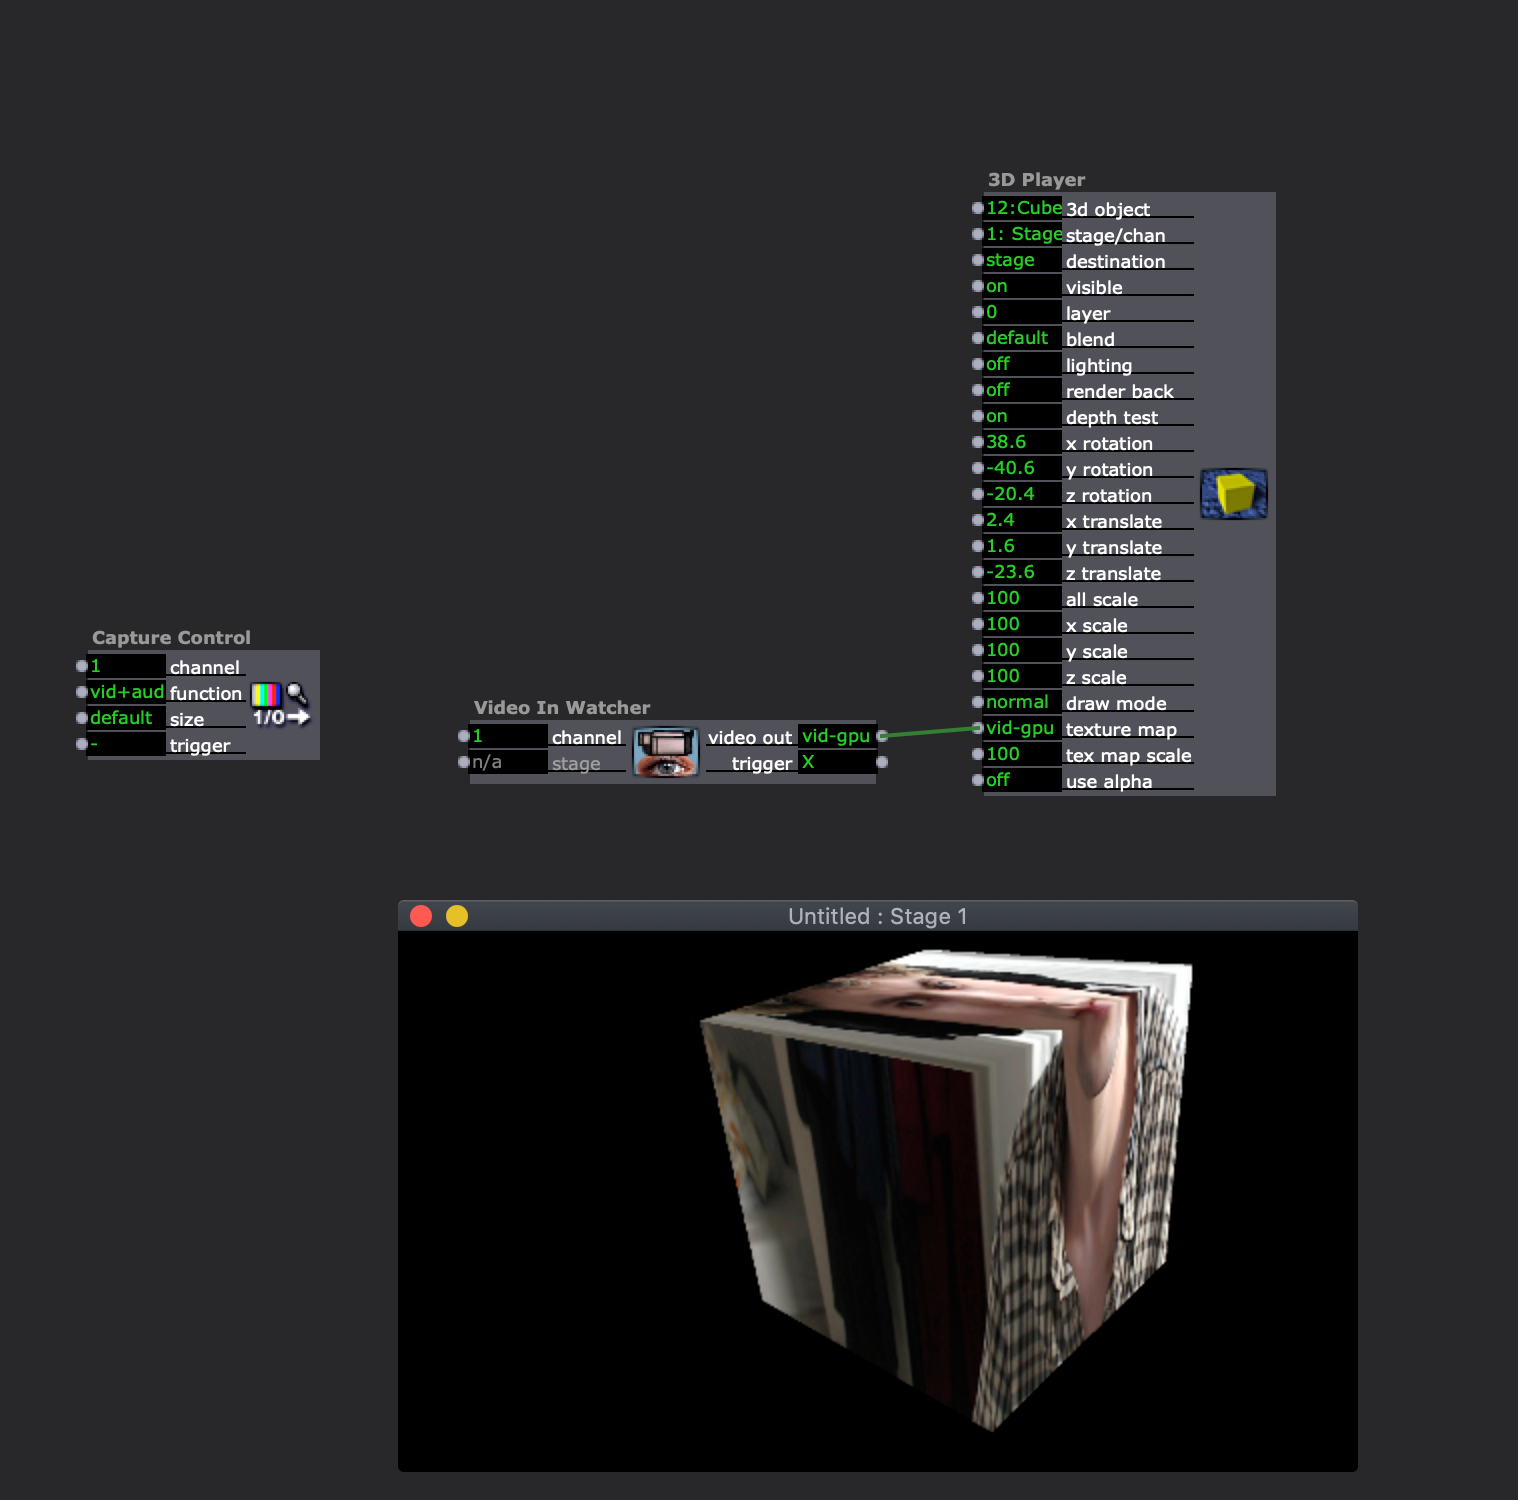
Another possible way is to make a .3ds model of your set (with a texture so that it can accept a texture in Isadora) using software like Cheetah3d, then making a separate 3ds model of each of your surfaces, import those, then use the 3D player to put your content onto each surface.
-
@jamie-nesbitt said:
here's the image of the set if that doesn't make sense. img_0879-resized.jpeg
Also, just a general tip for anyone who's working on a production with complex mapping surfaces: It's a good idea to get a flat image of the set as an image and use that to make a rough IzzyMap setup of the different surfaces. That way you can do design work ahead of time and have some form of previsualization, then when you get access to the physical projectors and the set, you have something to start from and tweak instead of having to start building from scratch.