[ANSWERED] skeleton visualiser with Kinect
-
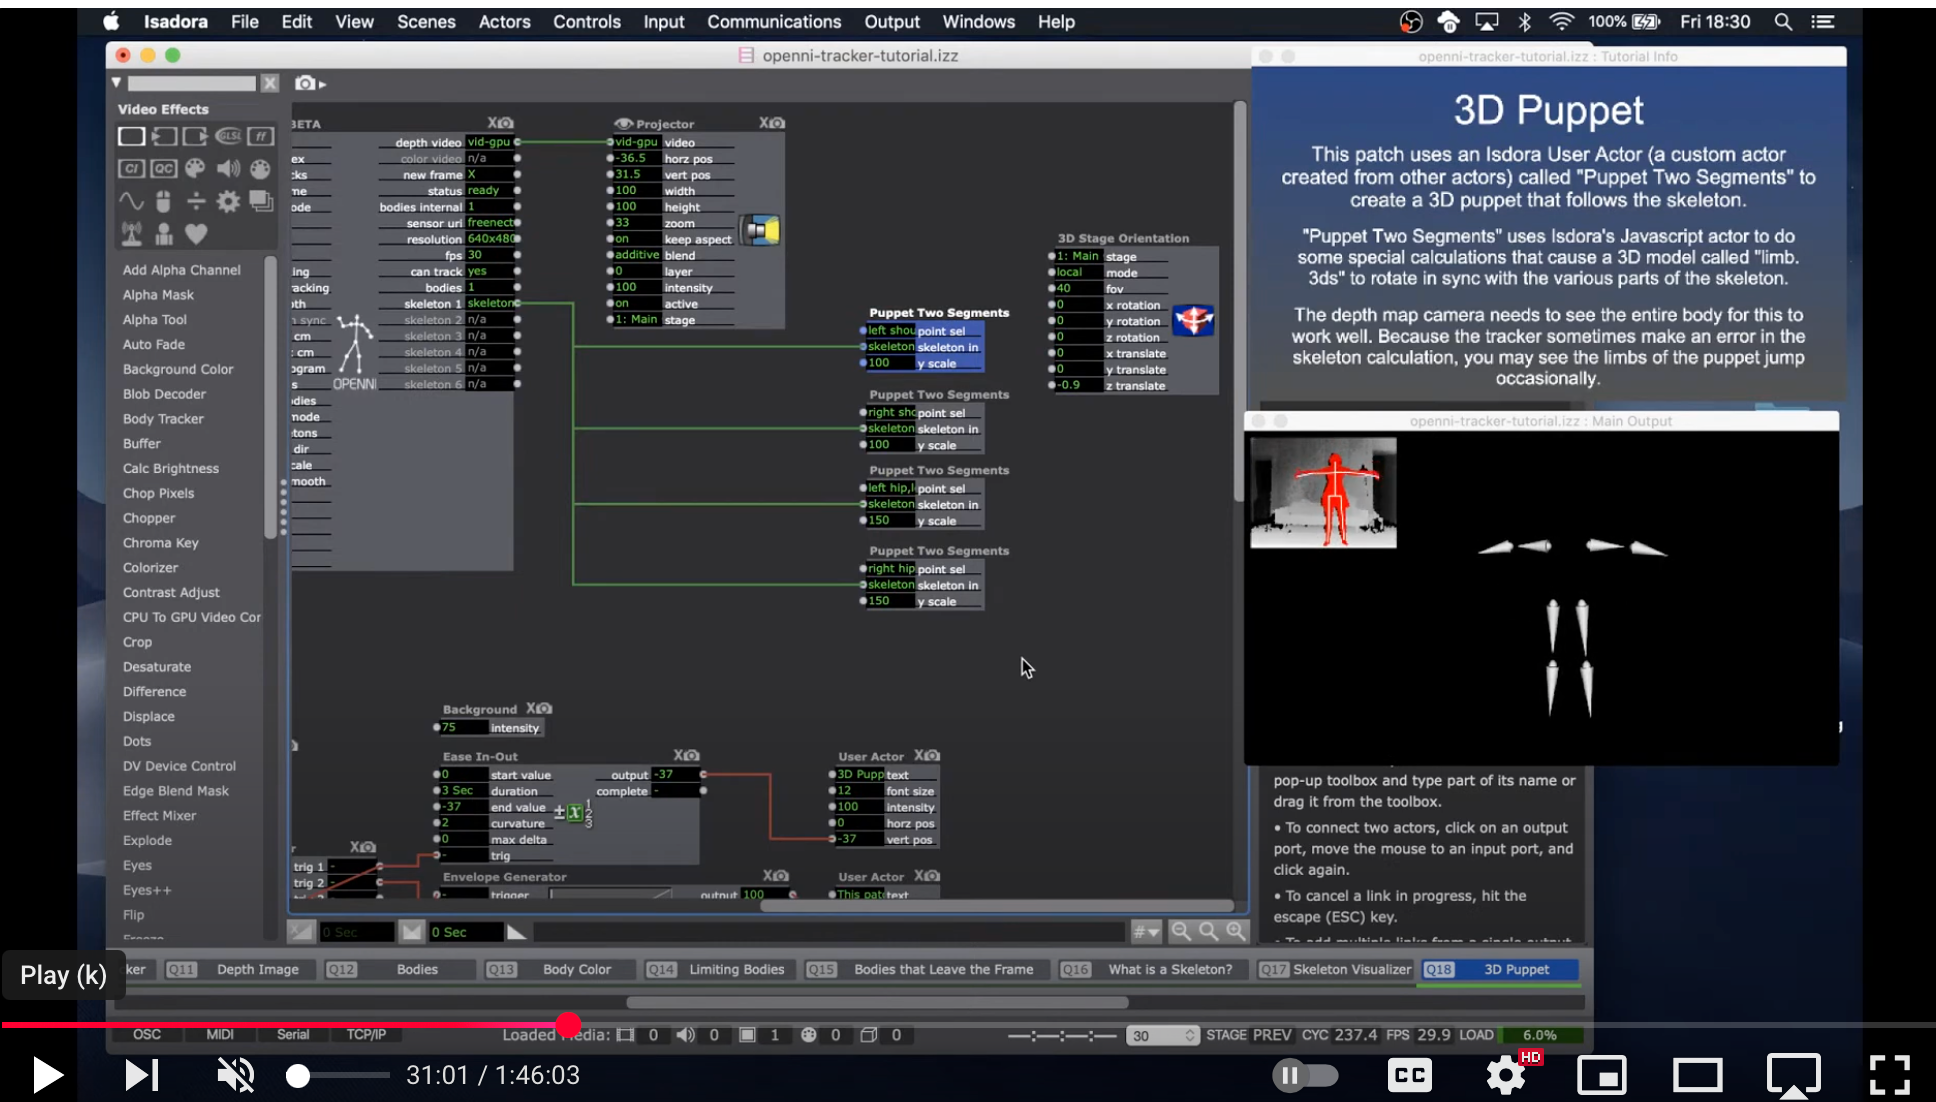
Hey all, I'm trying to make a skeleton visualiser similar to the attached image
I tried to follow the tutorial here https://community.troikatronix.com/topic/6601/guru-session-13-body-tracking-with-depth-cameras-fri-may-8th-6pm-cest-5pm-gmt-12pm-edt-9am-pdt but the full session materials weren't in the download folder. Could anyone advise?
I am essentially trying to understand :
- how I get this sort of 3D visual from the visualiser
- how to alter the aesthetic of this
- I am using an xbox kinnect camera, which is all working fine with the openni
Many thanks
-
As I wrote on the other post, the OpenNI Tutorial can be found here: https://troikatronix.com/add-ons/tutorial-openni-tracker/
It makes this puppet with the "Puppet Two Segments" User Actors shown in your screenshot. Double-click them to go inside and I believe you'll be able to find the 3D actor inside it responsible for rendering each segment's location using a specific 3d model, and you can then change the 3D Model being used by that User Actor by changing it in that User Actor and then closing the user actor and choosing "Save and Update All".
More about how to use User Actors (in general) can be found here: https://support.troikatronix.com/support/solutions/articles/13000091626-isadora-101-tutorial-11-creating-user-actors
Here's another 3d line puppet by the ever-fabulous @bonemap : https://troikatronix.com/add-ons/line-puppet/
@smoon said:
I am essentially trying to understand :
- how I get this sort of 3D visual from the visualiser
- how to alter the aesthetic of this
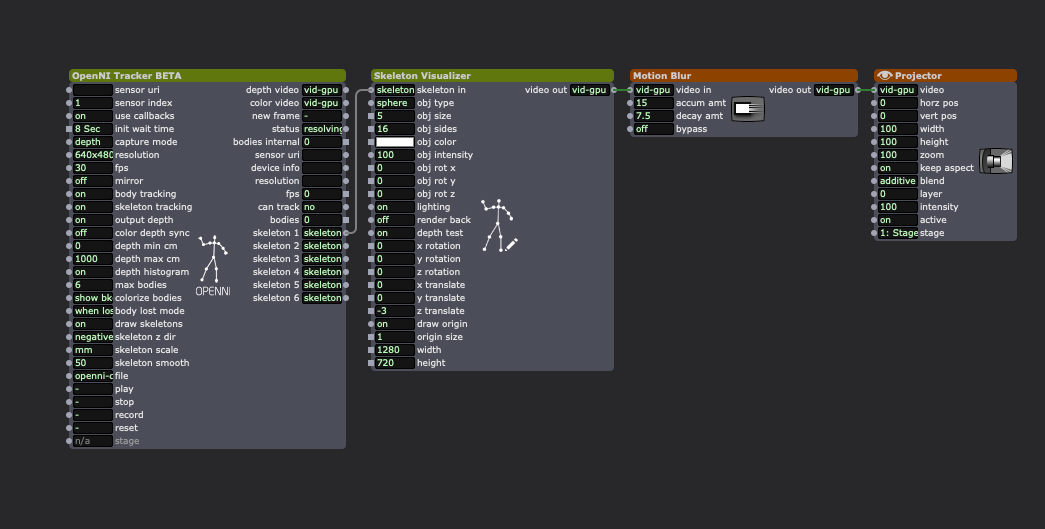
The Skeleton Visualizer actor can be used for a very basic form of this like so:

The aesthetic is changed by adding video effects like Motion Blur or Shimmer in the video actor chain (after the Skeleton Visualizer, but before the Projector actor):
Alternatively, you could send all this to a Virtual Stage and use the Get Stage Image actor to pull it back in, then apply effects to it, then send it to a regular Stage via another Projector actor. (This would be useful if you wanted to get multiple skeleton sources all together in one place before you apply the effects):
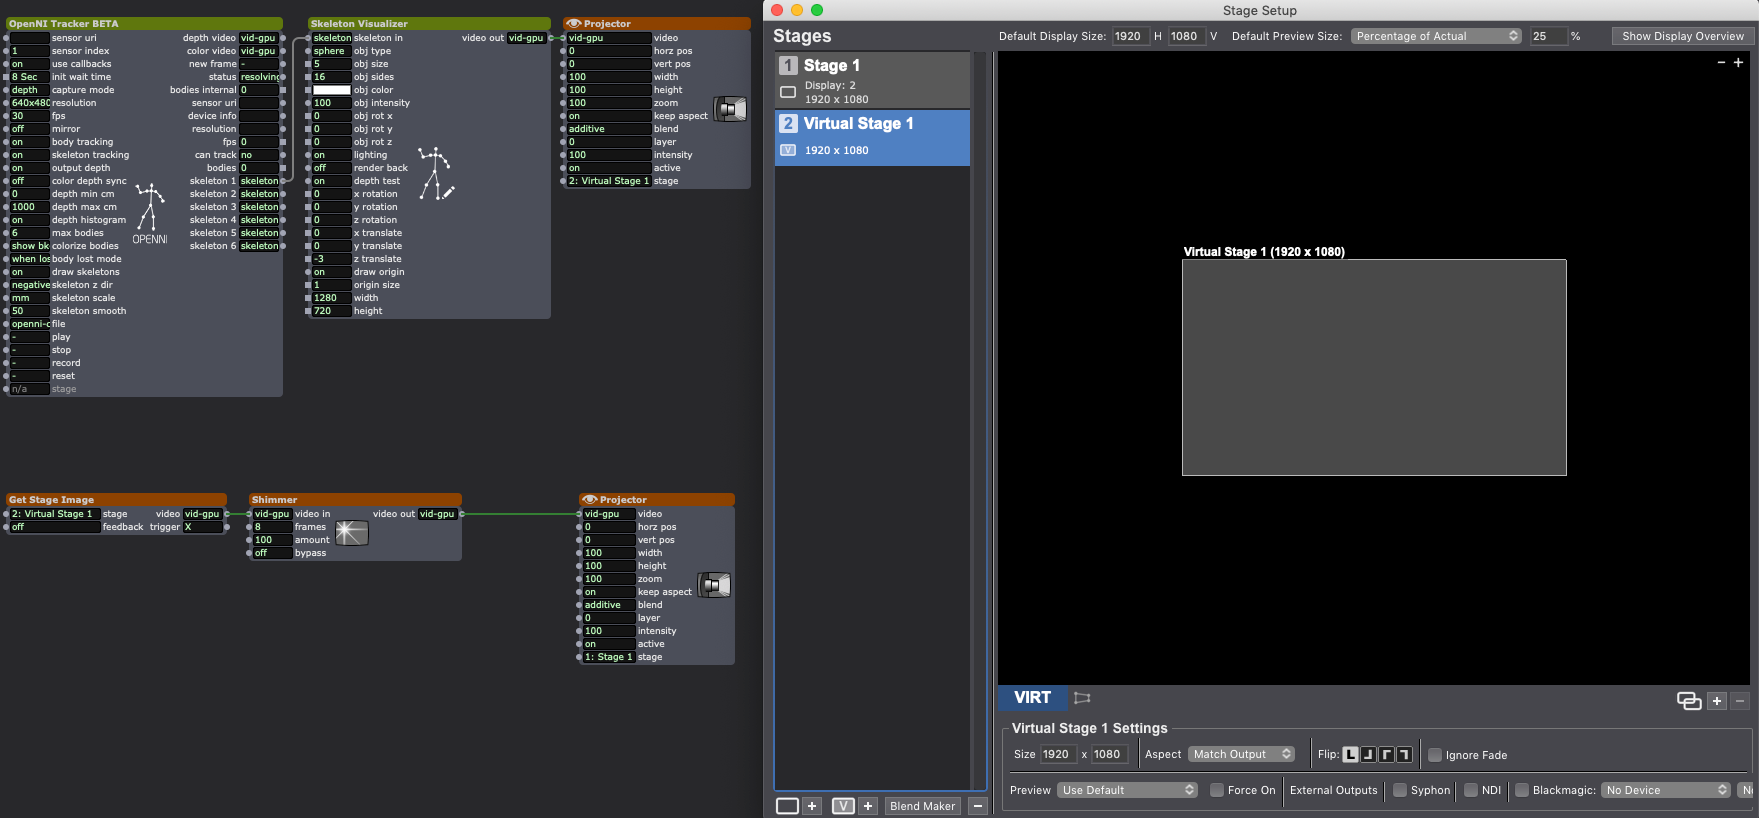
More about using Stage Setup to create a Virtual Stage can be found here: https://support.troikatronix.com/support/solutions/articles/13000064618-isadora-3-quick-start-with-stage-setup