[ANSWERED] 3ds files from Blender to Isadora
-
@bonemap Woland said you're the 3D expert but I’m open to anyone for advice!
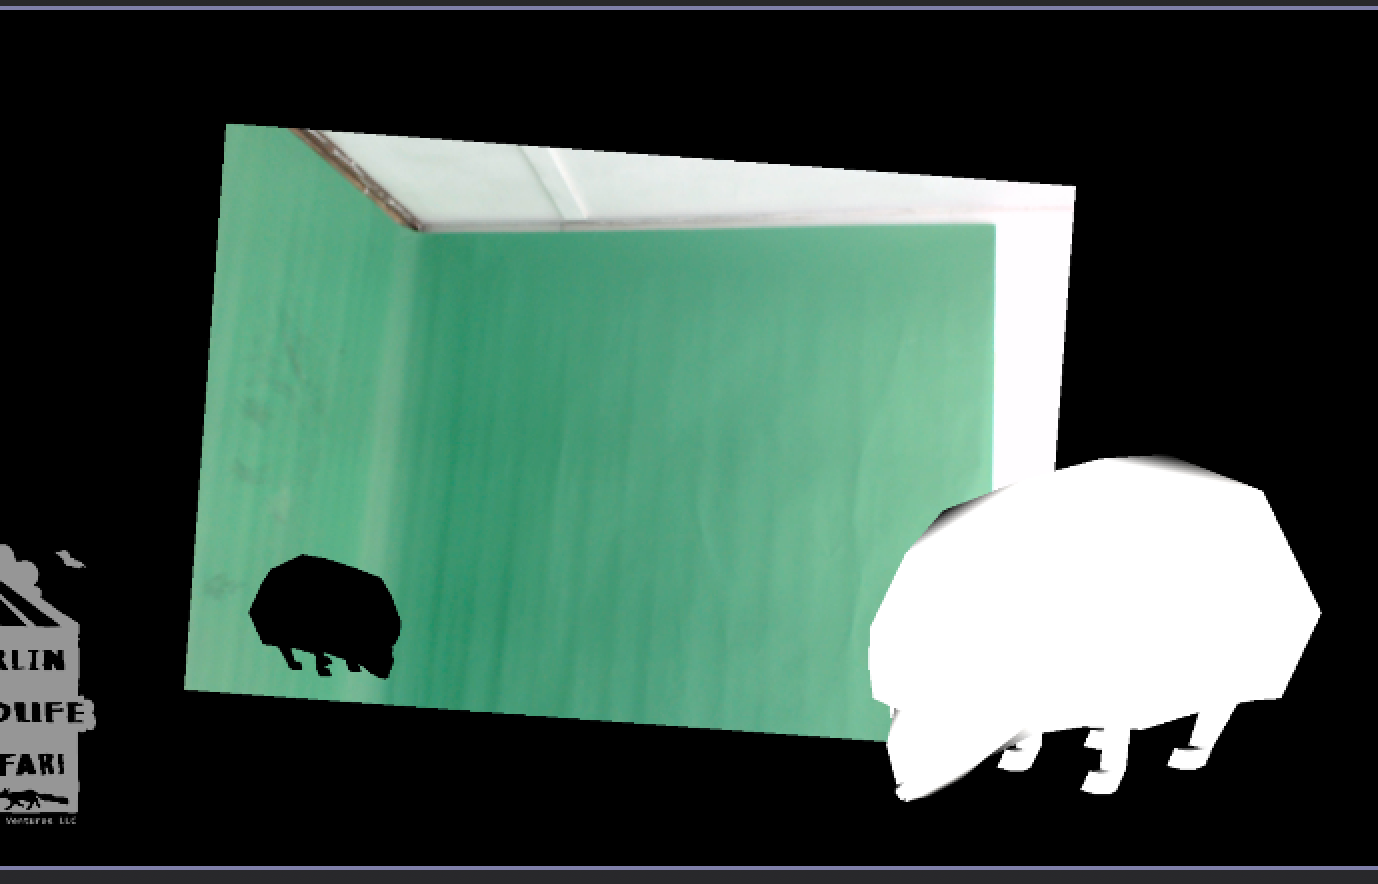
Woland really kindly built me this patch. It’s for a greenscreen installation where you can add “stickers” of 3d animals with different backgrounds. I can’t seem to get the lighting right. I’m exporting different hedgehogs from blender with edits to its material but no matter what I do the light in the Isadora 3d player seems to blow it out or barely make it visible. I am ok with turning lighting off for the different animals but it would obviously be cooler to have a bit of overhead light.
I’m a little experienced with blender but never heard of a 3ds file before this. I have the blender addon meant for autodesk to just be able to export them if that helps. I’m not sure which end the issue is on.Hedgehog blender file
Hedgehog 3ds file
-
Hi Lorel,
The 3DS file format is a legacy from 3d Studio Max, which was a popular 3D modelling and animation software acquired by Autodesk some time ago (decades ago). Most software developers have migrated to other popular file formats like .obj and others. Thankfully, Blender's open-source developers reinstated the format after it went missing for a couple of years. The 3D software Cheetah 3D (mac only) also supports the 3ds format and has a more direct workflow for preparing 3ds files for Isadora.
Your issue is this:
When importing .3ds files into Isadora, the 3D geometry does not automatically embed its image textures. To ensure your model does not appear blank, you must export an image file—typically a JPG or PNG—alongside the 3D geometry file from Blender. For Isadora to read and link the texture to the 3D mesh, both the .3ds file and the image file must be in the same folder. If they are separated, the file paths will break, and Isadora will fail to locate and render the texture on your object.
Once the 3D model is in the Isadora scene editor, you are not locked into the original texture exported from Blender. You can swap it for any other image file from your media bin by linking a Picture actor or Movie Player actor directly to the 3D player actor's texture input. This lets you dynamically replace the surface appearance of your geometry in real time, making it easy to cycle through different graphics, colours, or live video feeds without re-exporting the 3D mesh.
The 3D Light Orientation actor manages the illumination of 3D objects (your .3ds models) in the Isadora Scene Editor by altering the position, angle, and properties of a virtual light source. Instead of moving the 3D model itself, this actor allows you to shift how light hits the geometry using a specific set of XYZ inputs.
Best Wishes,
Russell
-
In addition to the other response...
When using .3ds files in Isadora, a critical format quirk requires the associated texture image file name to be 8 characters or fewer (excluding the extension). The legacy .3ds format strictly enforces this character limit for external asset references. Therefore, when preparing and unwrapping your 3D object in Blender, you must save your JPG or PNG texture with a very short file name (e.g., tex1.jpg or mesh_map.png) before exporting the geometry. If the image file name exceeds 8 characters, the file path breaks during export, and Isadora will fail to link or accept the texture.
Best WIshes
Russell
http://bonemap.com | Australia
Izzy STD 4.5.1 | USB 4.5.1 | + Beta
MBP 14” 2022 M2 16GB | 26.6.2 Tahoe
Mac Studio 2023 M2 Ultra 128GB | 26.6.2 Tahoe
Mac Mini 2025 M4 Pro 64GB | 26.6.2 Tahoe
MBP 16” 2026 M5 Max 128GB | 26.6.2 TahoeA range of deployable older Macs
-
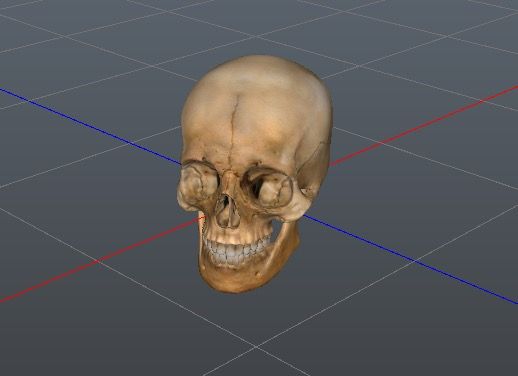
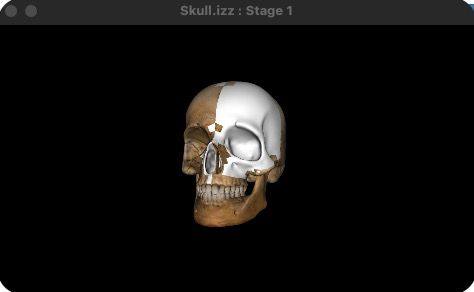
I have another problem with 3ds. The texture looks good in Cheetah but not in Isadora. Short name for the texture, in the same folder as the patch and 3ds file. Do you know where it could come from?

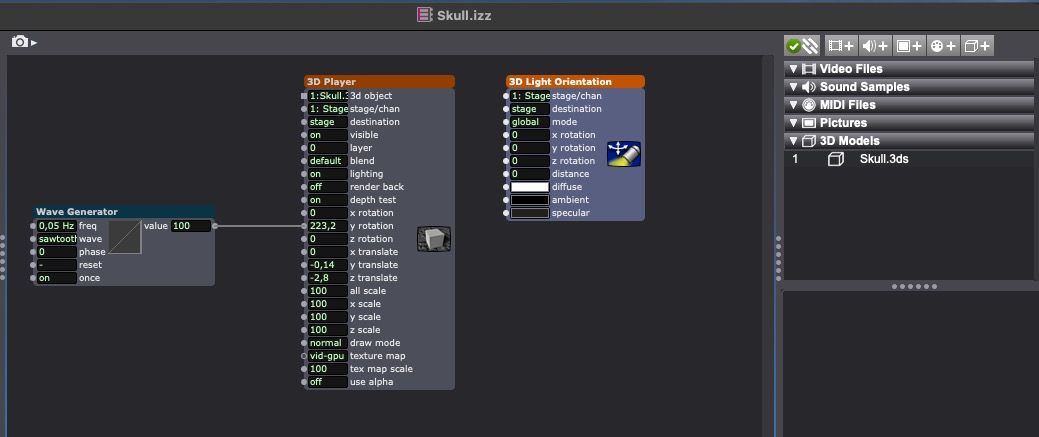
Best regards
Jean-François
• Izzy 4
- MacBook Pro M1 Max 16" 64GB RAM, Mac OS 15.3.2 Sequoia
- Mac Pro 5.1 middle 2012 (3,33 GHz 6-Core Intel Xeon, 32GB RAM, Radeon RX 580 8 GB ),
Mac OS 10.14.6 (Mojave)
- Mac mini Pro M4, Mac OS 15.3.2 Sequoia- A range of deployable older Macs
Located in Bremen, Germany
- A range of deployable older Macs
-
I have come across this rendering issue often. Have a look at my Part 2 below to assist with your texture issue. Following is a checklist of the 3ds legacy file format limitations and how to solve issues associated with them:
When using legacy .3ds files in Isadora, texture and geometry breaks are almost always caused by the format’s rigid, 1990s DOS-era nomenclature limitations. Because Isadora parses the .3ds file strictly by its internal chunk hierarchy, if the embedded links or geometric structures violate these old rules, the texture maps fail entirely or apply incorrectly.
Here is a troubleshooting checklist tailored specifically for resolving image linking and face-mapping issues when bringing .3ds models into Isadora.
Part 1: Texture Image Link & File Issues
If Isadora throws an alert saying "the default texture image cannot be found," the link between the geometry and the image asset is broken.1. The "Beside the File" Rule
• Check: Is the texture image file saved in the exact same directory as the .3ds file?
• Why: The .3ds format usually strips absolute path maps (e.g., C:/Users/Name/Project/Texture.jpg). Isadora expects the texture path to be strictly local. Keep them side-by-side in the same folder before importing into Isadora.
2. The 8.3 Character Limit (DOS Convention)
• Check: Are both the image file name and its extension 8 characters or fewer? (e.g., woodtex1.jpg is valid; wooden_texture.jpeg will fail).
• Why: In a .3ds payload, filenames longer than 8 characters are violently truncated upon export. If your file is named mycooltexture.jpg, the .3ds file might internally look for mycoolte.jpg. Isadora won't find it, causing the link to snap.
• Fix: Rename the image to a short format, re-assign it to the material in your 3D software (like Blender or Cheetah 3d), and re-export. Keep everything lowercase to avoid cross-platform case-sensitivity bugs.
3. Material Name Limits
• Check: Ensure the name of the Material itself inside your 3D suite is under 16 characters (and ideally follows the short 8.3 layout).
• Why: Overly complex material names (e.g., Material_Red_Glossy_Final) will corrupt the EDIT_MATERIAL chunk layout on export, preventing Isadora from mapping the image channel correctly.
4. The "Placeholder" Rule• Check: Did you assign a dummy/placeholder texture to the object before exporting?
• Why: The Isadora 3D Player or 3D Model Particles actors cannot accept live texture-map inputs or video streams unless a texture map was natively embedded during the 3D authoring process. If you export a blank, untextured material, Isadora completely omits the mapping coordinates data chunk, meaning you cannot dynamically drop video feeds onto the model later.
Part 2: Texture Not Working Successfully on All Geometry Faces
If your texture shows up on some faces but looks warped, stretched, missing, or invisible on others, the issue lies in the geometric structure constraints of the .3ds file.5. Non-Triangulated Geometry (The Poly-Count Flaw)
• Check: Is your 3D model entirely composed of Triangles?
• Why: The .3ds format does not support Quads (4-sided polygons) or N-gons (multi-sided polygons). It only understands the OBJ_TRIMESH data block, which forces a strict 3-vertex Face List structure. If you attempt to export quads, the exporter will try to auto-triangulate them, which often completely breaks or scrambles the associated UV texture coordinates on those newly split faces.
• Fix: In your 3D modeling software, manually run a Triangulate operation on your mesh before initiating the .3ds export.
6. Missing UV Unwrapping (Mapping Coordinates)
• Check: Has the object been fully UV Unwrapped?
• Why: If some faces are blank, the 0x4140 texture mapping coordinate sub-chunk is likely missing data for those specific vertices.
• Fix: Switch your software to Edit/UV Mode, select all faces, and perform a clean UV Unwrap layout map. Ensure no faces are left unmapped.
7. Inverted Normals (Backface Culling)
• Check: Are all the polygon face Normals facing outward toward the camera?
• Why: Isadora uses backface culling to save processing power. If a geometric face's normal is accidentally inverted (pointing inward), the face—and its texture—will appear entirely invisible or transparent in Isadora's 3D Stage.
• Fix: In your 3D software, display face orientations, select the inverted geometry, and perform a Recalculate Normals or Flip Normals action before exporting.
8. The 65,536 Face & Vertex Limit (Per-Mesh Constraint)
• Check: Does your individual mesh object contain fewer than 65,536 vertices and fewer than 65,536 faces?
• Why: In the .3ds chunk nomenclature, the data arrays for vertices (0x4110) and faces (0x4120) use a 2-byte (16-bit) unsigned integer to store indices. A 16-bit integer can only count up to exactly 65,535. If a single mesh exceeds this number, the index wraps back around to zero, causing massive data corruption. Isadora will either fail to render the excess faces, scramble the UV textures across randomly glitched faces, or crash entirely.
• Fix: If your model is dense, you must split it up:
1 In your 3D software, select your model and separate it into multiple, smaller mesh objects (e.g., Mesh_Part1, Mesh_Part2).
2 Ensure each individual object component is well under the 65,535 vertex/face threshold.
3 Export them together. The .3ds file format allows multiple distinct EDIT_OBJECT (0x4000) chunks, meaning you can have hundreds of thousands of polygons in the overall file, as long as no single object chunk exceeds the 16-bit limit.Thanks to AI for assisting to articulate this checklist quickly.
Best WIshes
Russell
http://bonemap.com | Australia
Izzy STD 4.5.1 | USB 4.5.1 | + Beta
MBP 14” 2022 M2 16GB | 26.6.2 Tahoe
Mac Studio 2023 M2 Ultra 128GB | 26.6.2 Tahoe
Mac Mini 2025 M4 Pro 64GB | 26.6.2 Tahoe
MBP 16” 2026 M5 Max 128GB | 26.6.2 TahoeA range of deployable older Macs
-
Thanks a lot. Promise next time I will ask AI directly to save your time.
I think my problem is point 8. I will try to solve it.
Again thanks a lot
Best regards
Jean-François
• Izzy 4
- MacBook Pro M1 Max 16" 64GB RAM, Mac OS 15.3.2 Sequoia
- Mac Pro 5.1 middle 2012 (3,33 GHz 6-Core Intel Xeon, 32GB RAM, Radeon RX 580 8 GB ),
Mac OS 10.14.6 (Mojave)
- Mac mini Pro M4, Mac OS 15.3.2 Sequoia- A range of deployable older Macs
Located in Bremen, Germany
- A range of deployable older Macs
-