Does anyone know if you can interface VR controllers with Isadora? I used to use Wii controllers via OSC back in the day, but am wondering if we can get more accurate 6Dof sensing. Note that I don't have a headset, and want to use the controllers directly, something like Oculus Touch.
thanks
@bonemap said:
Is the best option to hard sync through the ‘position’ input of each instance of the MoviePlayer? Or to sync trigger a start time and let each MoviePlayer do its thing before triggering a start time again on loop?
I think you may see similar results with both of these methods, and both should prevent any noticeable amount of drift from occurring over a long period of time.
@bonemap said:
I have access to a Intel MacMini that could be used to send timecode as @juriaan has suggested.
If you go the timecode route you may want to check out the MTC Movie Locker actor, though with the Movie Player actors in timecode mode, you could probably just hook up an MTC Reader actor directly to the 'position' input of each Movie Player actor.
@bonemap said:
Keeping the eight video streams in sync for a seamless blend is going to be critical.
@bonemap said:
I am anticipating using the 3 of the same spec MacMini but two will have 3 heads and one will have two heads to make up the eight video outputs.
I'd also suggest merging the video files for each computer (you'd have two triple-wide and one double-wide) then using the Chopper actor to distribute them to the Stages. This gives you fewer videos to keep in synch as you'd only be keeping the different computers in synch and wouldn't have to worry about keeping videos on the same computer in synch.
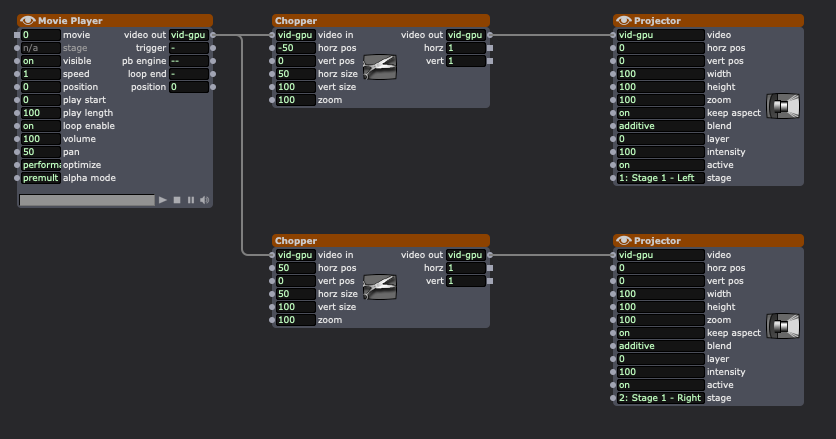
Honestly if you could get a single, beefy computer like a Mac Studio or a decent Windows machine and a couple Datapath fx4's or Matrox QuadHead2Gos, you could merge all 8 videos into a single octuple-wide video and use choppers to distribute the right pieces to the right displays. Since you'd only ever be playing a single video (and that video would be split up and sent to all 8 displays) your content would always be in synch so you wouldn't need any clever multi-computer method for synching them up. This would really be the ideal method for getting *perfect* synch across 8 outputs.
Hi,
Thank you for your responses. I will have the computers on a dedicated wired network hub, this sounds sensible. The installation will run for 3 months - 6 Days a week - 7 hours day. 8 channel blend for one seamless presentation. Is the best option to hard sync through the ‘position’ input of each instance of the MoviePlayer? Or to sync trigger a start time and let each MoviePlayer do its thing before triggering a start time again on loop? Each movie file will be exactly the same duration. I am anticipating using the 3 of the same spec MacMini but two will have 3 heads and one will have two heads to make up the eight video outputs. I have access to a Intel MacMini that could be used to send timecode as @juriaan has suggested.
Besides the two strategies suggested above is there any other things to try that will keep the playback in perfect sync for the duration of the video loop? The video will be under 10 minutes loop duration.
Thanks for your advice it is much appreciated.
Best wishes
Russell
@gelmystery said:
audio stream to be made available from the movie player
*Currently this is not possible.
Big things are coming on the audio side though. We are hard at work :)
@woland I tested a similar situation and it works very well (better if computers are on an ethernet connection)
Personally I would have one machine (that doesn’t have any video rendering task) and let that machine sent timecode, and then use that to network all your other machines with.
Am I missing something? Seems like people have been asking for the audio stream to be made available from the movie player. Is this still being worked out? Thanks
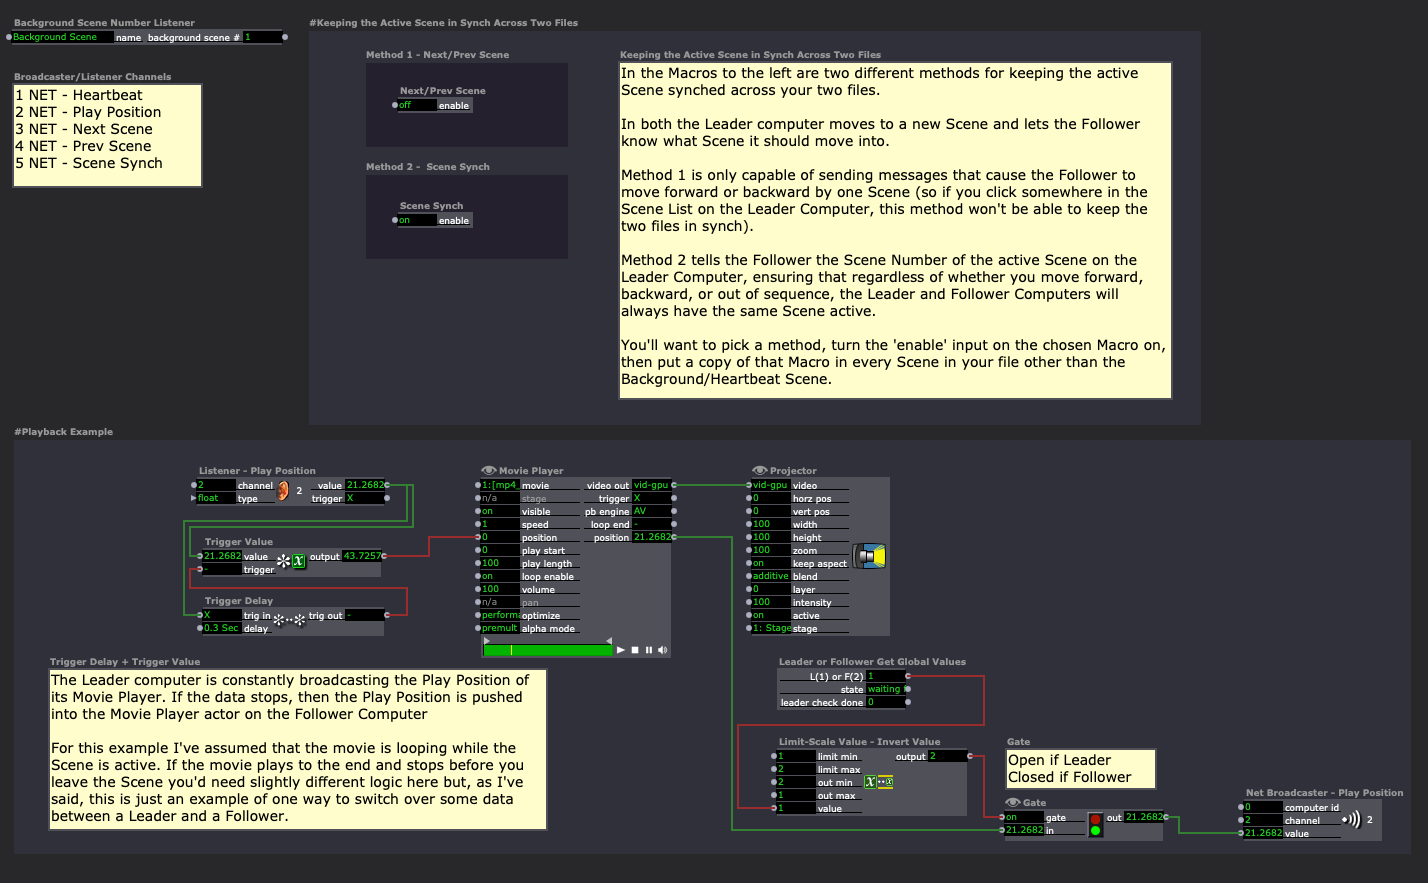
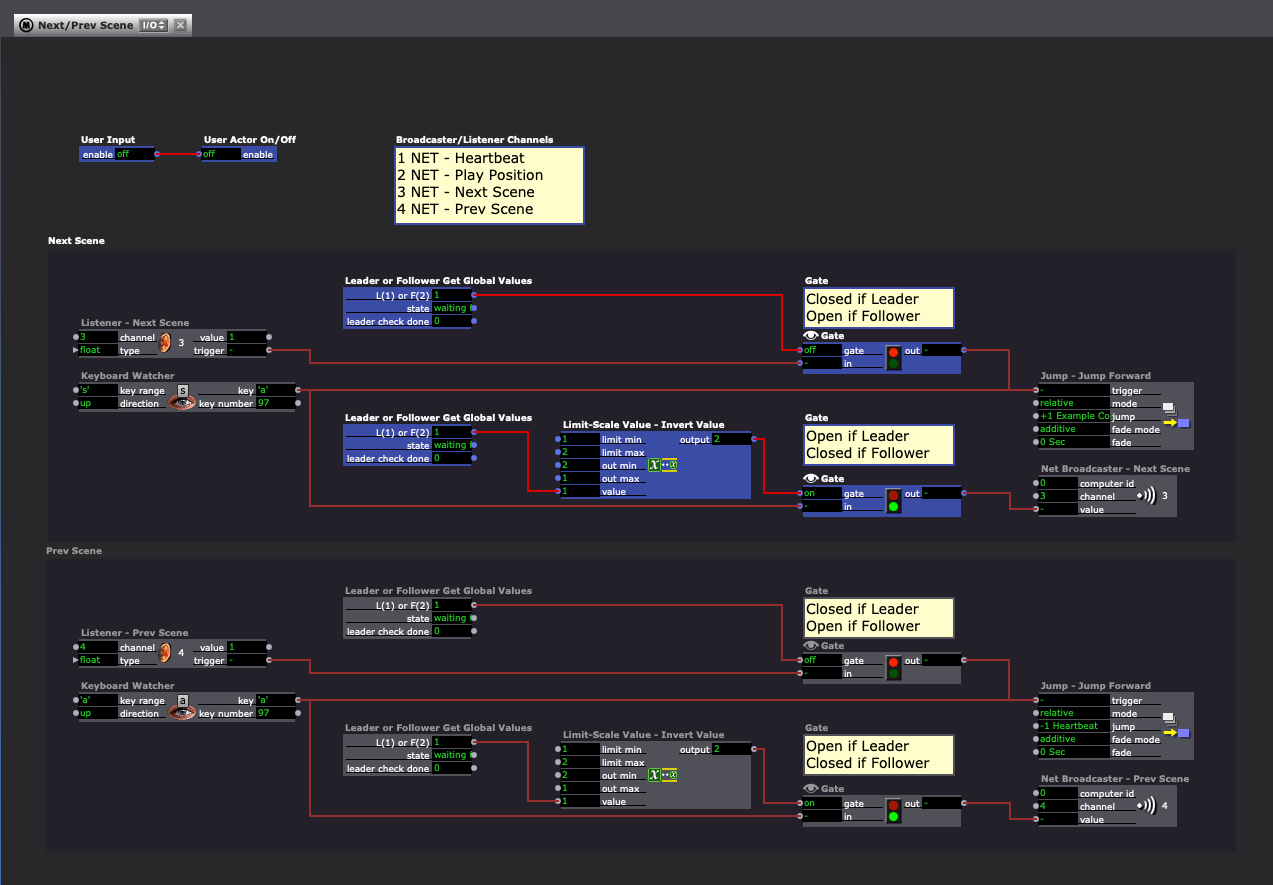
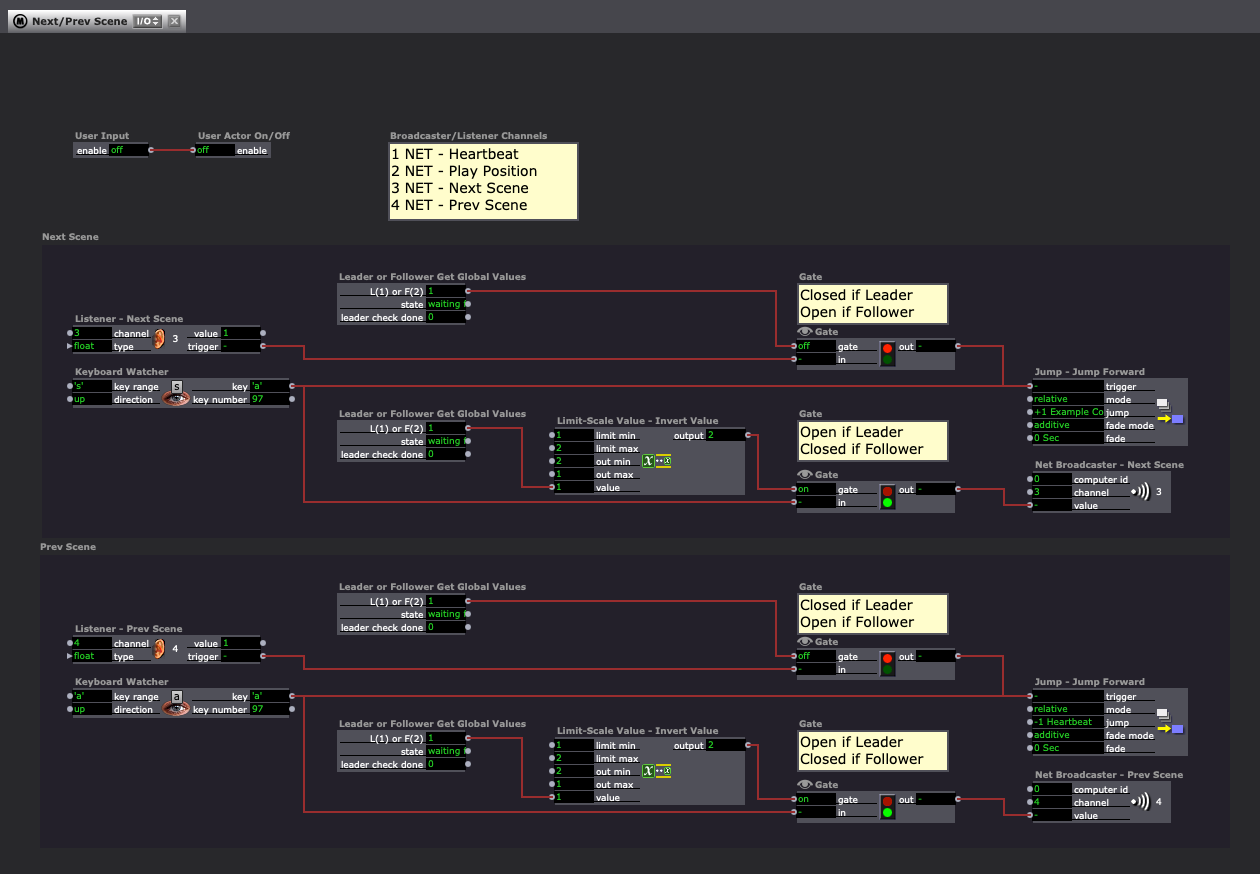
Maybe you can start from these screenshots and the related file. They were intended for a very similar purpose: leader-simple-iso-bot.izz

Hi,
I am not clear on how many Thunderbolt ports are available on the M1 MacMini. The MacStudio I was using had three Thunderbolt ports. I think it may be important to use DisplayPort compatible Thunderbolt ports for video out. The standard USBC ports may not work for this.
Best wishes,
Russell
Hi,
I am looking for advice about syncing video files across networked Mac computers.
I have a gallery installation in development where I have indicated to the team we might able to use Isadora to blend eight channels of video projection using 3 x macmini m4.
Keeping the eight video streams in sync for a seamless blend is going to be critical. What is the best approach to nailing video sync across multiple MoviePlayers on different computers?
Best wishes,
Russell