• Products
    • Isadora
    • Get It
    • ADD-ONS
    • IzzyCast
    • Get It
  • Forum
  • Help
  • Werkstatt
  • Newsletter
  • Impressum
  • Dsgvo
  • Press
  • Isadora
  • Get It
  • ADD-ONS
  • IzzyCast
  • Get It
  • Press
  • Dsgvo
  • Impressum

Navigation

    • Register
    • Login
    • Search
    • Categories
    • Recent
    • Popular
    • Tags

    Adding Bezier handles in Bezier mask (IzzyMap)?

    How To... ?
    4
    5
    2036
    Loading More Posts
    • Oldest to Newest
    • Newest to Oldest
    • Most Votes
    Reply
    • Reply as topic
    Log in to reply
    This topic has been deleted. Only users with topic management privileges can see it.
    • eight
      eight last edited by

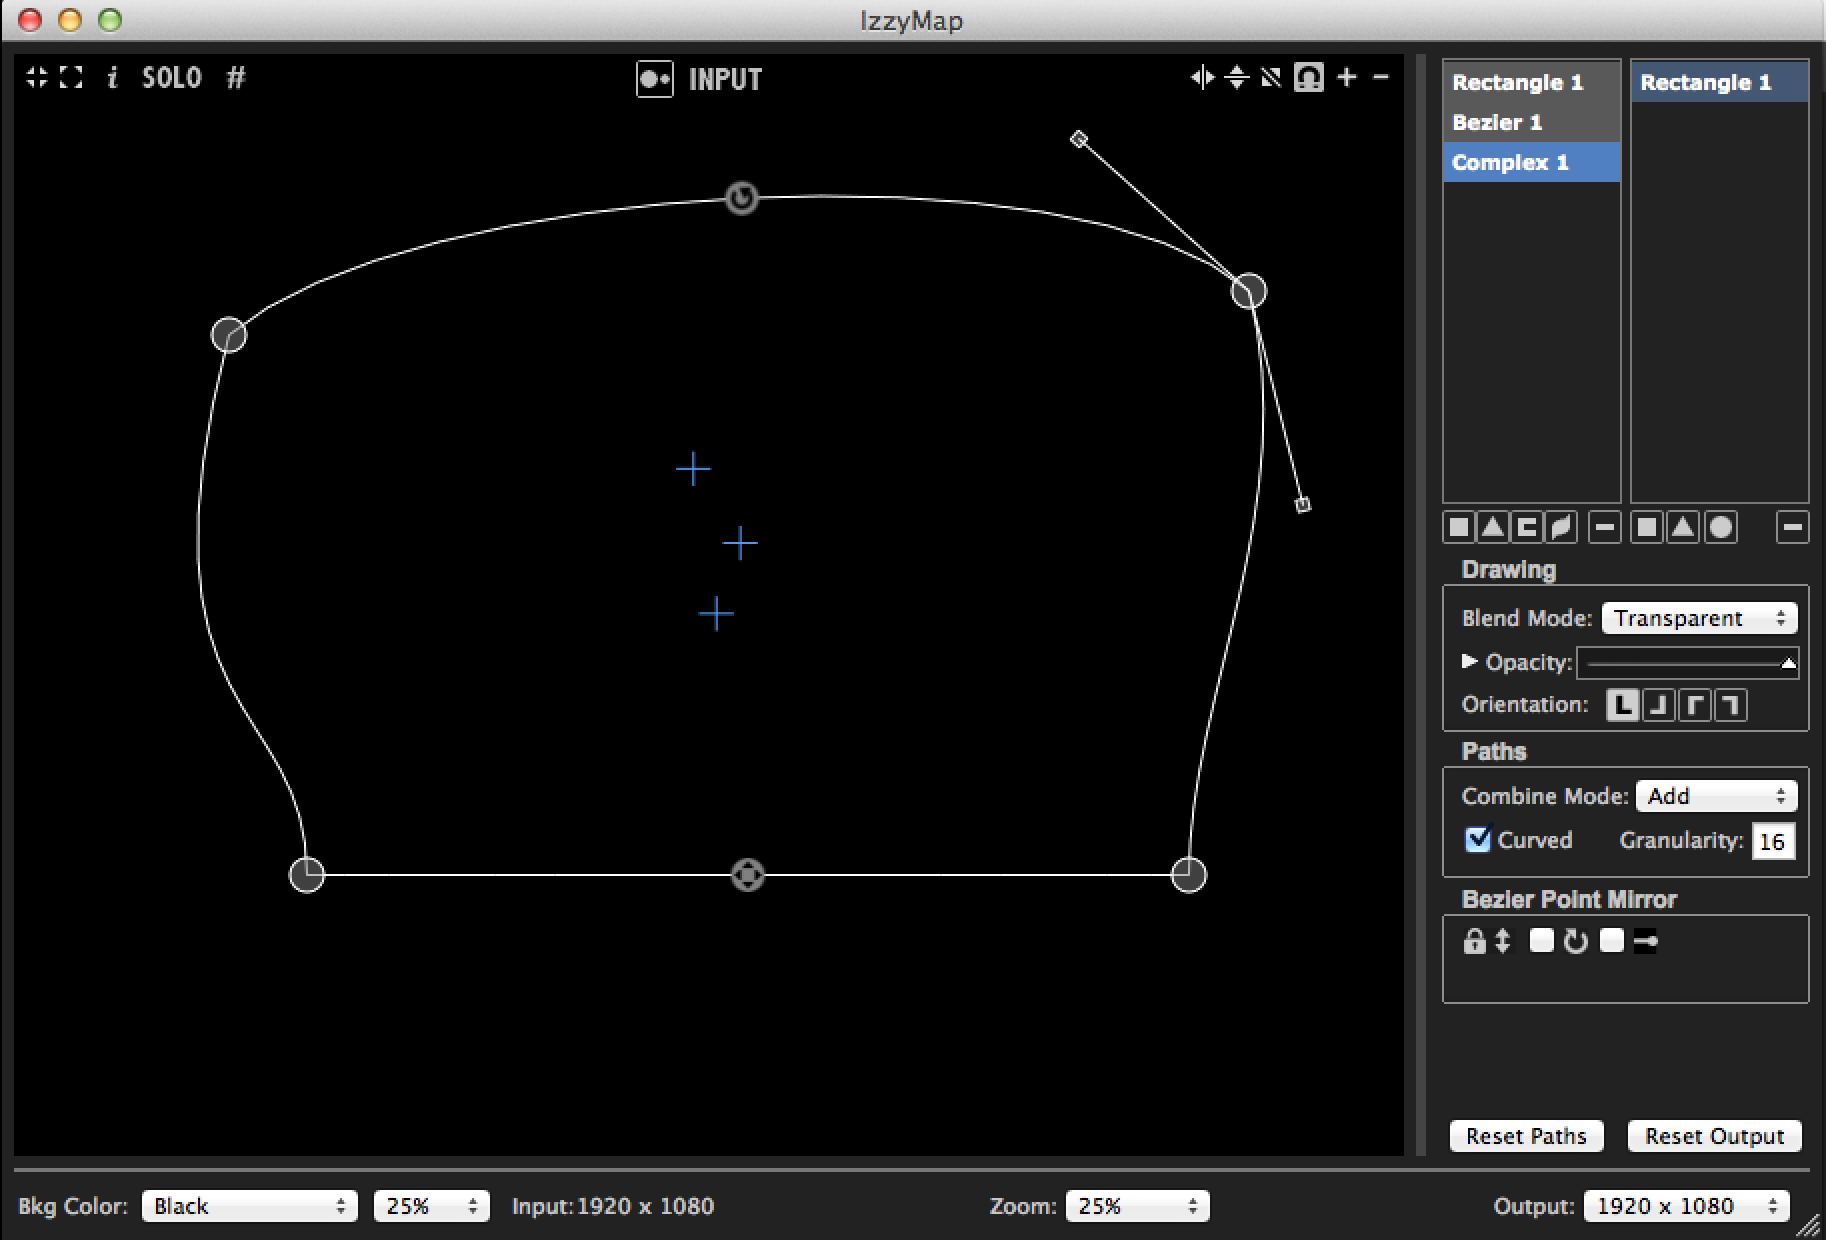
      I was able to add the bezier handles in the Complex Mask:

      But see no way to do it in the Bezier mask.
      Any pointers?
      Thanks

      046cce-screen-shot-2014-09-05-at-10.52.17-pm.png

      Analysis: http://post.scriptum.ru | Synthesis: http://onewaytheater.us
      Twitter: https://twitter.com/eight_io | Flickr: http://www.flickr.com/photos/eight_io/
      Github: https://github.com/eighteight | MulchCam: https//mulchcam.com
      MulchTune: https://itunes.apple.com/us/app/mulch-tune/id1070973465 | Augmented Theatre: https://augmentedtheatre.com

      1 Reply Last reply Reply Quote 0
      • mockej
        mockej last edited by

        Hi @eight, the amount of points (or divisions) on the grid of the bezier mask are defined by specifying "Grid Divisions" on the right hand palette. As far as I can see you can go up to 30 x 30.

        Take care
        m

        rMBP (2015) i7, 16gig, AMD Radeon R9 M370X, OS X 10.15 | located in Johannesburg, South Africa

        1 Reply Last reply Reply Quote 0
        • mark
          mark last edited by

          However, @eight is using a complex mask, not a beziér grid. To add points to one of the shapes of a complex mask, simply hold down the option key (Mac) or Alt key (Windows) -- you will see a new point tracking your mouse. When you click, the point is created.

          Best,
          Mark

          Media Artist & Creator of Isadora
          Macintosh SE-30, 32 Mb RAM, MacOS 7.6, Dual Floppy Drives

          1 Reply Last reply Reply Quote 0
          • DusX
            DusX Tech Staff last edited by

            @eight

            not sure, but you might have missed it for Bezier, because it is they are only available for the Output of the Bezier.
            With the input of a bezier you can move the points of the the divided segments around, but the Output you can select curved in the same manner as you did before.
            The options are a little different, but its all pretty clear.
            Select the output, then select the Bezier slice in the output.
            this will activate its options. Check 'curved' in the paths section.
            You can even publish the magnitude and rotation of each handle.

            Troikatronix Technical Support

            • New Support Ticket Link: https://support.troikatronix.com/support/tickets/new
            • My Add-ons: https://troikatronix.com/add-ons/?u=dusx
            • Profession Services: https://support.troikatronix.com/support/solutions/articles/13000109444-professional-services

            Running: Win 11 64bit, i7, M.2 PCIe SSD's, 32gb DDR4, nVidia GTX 4070 | located in Ontario Canada.

            1 Reply Last reply Reply Quote 0
            • eight
              eight last edited by

              @DusX: Yes, the output is where one gets the bezier handles in the Bezier Mask.

              Thanks.
              --8

              Analysis: http://post.scriptum.ru | Synthesis: http://onewaytheater.us
              Twitter: https://twitter.com/eight_io | Flickr: http://www.flickr.com/photos/eight_io/
              Github: https://github.com/eighteight | MulchCam: https//mulchcam.com
              MulchTune: https://itunes.apple.com/us/app/mulch-tune/id1070973465 | Augmented Theatre: https://augmentedtheatre.com

              1 Reply Last reply Reply Quote 0
              • First post
                Last post