ESP8226 WiFi boards and ESP32-CAM
-
Is anyone using ESP8226's for data gathering and sending data via WiFi? They are very cheap and fairly easy to set up. Can anyone point me to some information?
The ESP32-CAM is a nifty device for generating a live video input..but getting the stream into Isadora is foxing me.
-
@agentsimon2 said:
ESP8226
Hi,
I did start looking at these ESP8226 WiFi boards but went with NodeMCU instead: https://esphome.io/devices/nodemcu_esp32.html

I have six of these units that each run around 100 rgb LEDS inside costumes. They are controlled through OSC via an Isadora patch.
Kind Regards
Russell
-
ohh I have been working with my one Nodemcu today and have had some success with OSC. I did find sending and receiving things via OSC quite easy, for a while I wasted time looking for an installer as I thought it needed one like MQTT and the internet here in Vietnam is slow at the moment because one of the underground cable broke. Such is life!
I was thinking of doing a How to for these devices. I have only ever used them outside Isadora for a WiFi mapping project and converting a Doremon toy to indicate air pollution levels. I must admit I am very rusty with Isadora but thanks to Marks exceptional GURU broadcasts am getting up to speed
-
@agentsimon2 said:
I was thinking of doing a How to for these devices.
Well I think that is a great thing to do. I would suggest going for a general purpose protocol would provide the most benefit. Going with OSC is going to be worthwhile because it is widely implemented - that’s why I have used it.
The nodeMCU appear to be a good board, I haven’t had any issues with them yet. I look forward to seeing your notes about how to implement Wi-Fi controller boards.
Kind regards
Russell
-

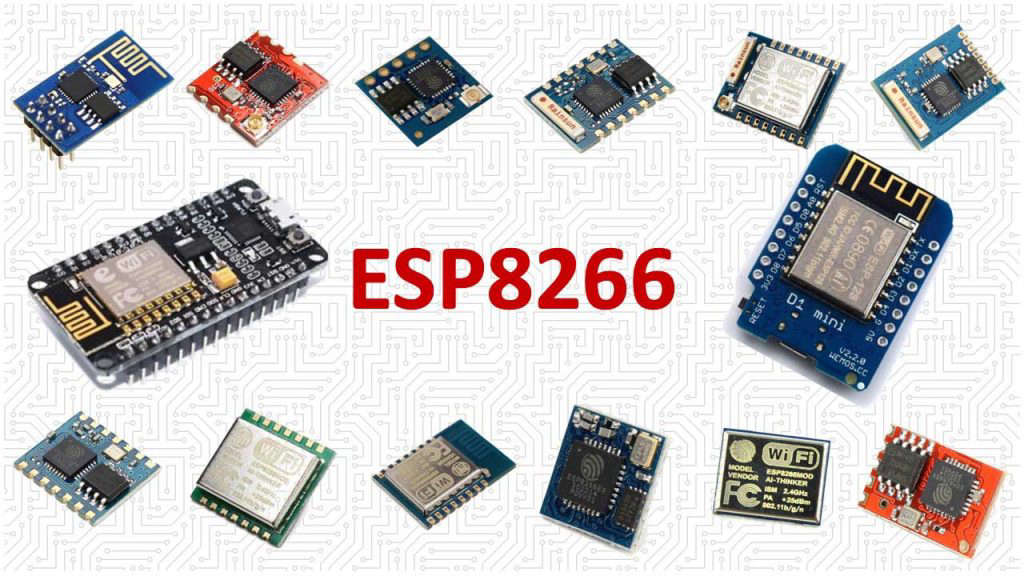
The ESP8226 is a cheap programmable WIFI board. They come in various flavors from the simple tiny ESP-01 to the larger NodeMcu. My favorite is the WeMos D1 mini. Which one you work with will be determined by the application you are going to get them to do for you and Isadora. There are plenty of places online that sell them, find a trustworthy seller as there are also a lot of cheap copies around. I usually buy two or three at a time just in case one is defective or I accidentally kill one whilst experimenting. There is a very good selection of modules that you can use to input into the ESP822s like the HC-SR04 Sonic sensor, IR transmitters and receivers, small lasers, humidity, temperature sensors, gyroscopes..an awful lot of things.
Power
If the ESP8226 device has a micro USB connector then you can power it with a phone USB battery brick. The WeMos D1 mini has a battery module that you can attach to the board which is pretty nifty. You can input 5V to most of the boards but it usually has to a regulated supply otherwise you might damage the board your powering.
Programming
This can be done via the Arduino IDE or Visual Studio Code. If you use the Arduino IDE then you will have to install the ESP8226 boards (see https://github.com/esp8266/Arduino). You can also useVisual Studio Code (https://code.visualstudio.com/) using Platform IO which installs the boards when you make the initial board selection (https://www.youtube.com/watch?v=0poh_2rBq7E&t=531s). You may have to install a driver so that your computer can see the attached board. (https://learn.sparkfun.com/tutorials/how-to-install-ftdi-drivers/mac) (
(https://www.arduino.cc/en/Guide/DriverInstallation)
Type in OSC in the search window and install the library
Go to the OSC examples and select the ESP8226RecieveMessage
Put in your WiFi details for the network your using at line 19 and 20. Put in the IP address of the computer your using (You can find this at the bottom of the Isadora preferences/midi/Net settings Local IP Address ). Make sure that you use a comma “,” between the numbers and not a dot “.”. At line 24 change the port number to the port number of the computer (by default 12345. You can change this in the Midi/Net preferences if you desire..just make sure they match with the number in the Arduino sketch). Compile and upload the sketch. In the serial monitor you will see the IP that the WeMos is using, make a note of it. If the serial monitor is printing rubbish the make sure the Baud rate is set to 112500 to match the rate defined in the setup at line 28. If the sketch doesn't compile then check you have set the board type to match the one you are using and also check the port in the tools menu.
Start up Isadora and a new patch and in the stream set up click on the auto detect. Change the channel number to 1. You should see the words “hello, osc.” appear. ?If not check the port numbers in your Arduino sketch and in Isadora. Click OK. The ESP8226 is now sending data to Isadora. Add an OSC Multi Listener to the ppatch. Make sure the num chan matches the one you just put in the stream settings. Toggle the show addr on and off and you should see the message “hello, osc.” and the /test show or not show on the actor.
Sending data from a Sonic sensor HC-SR04

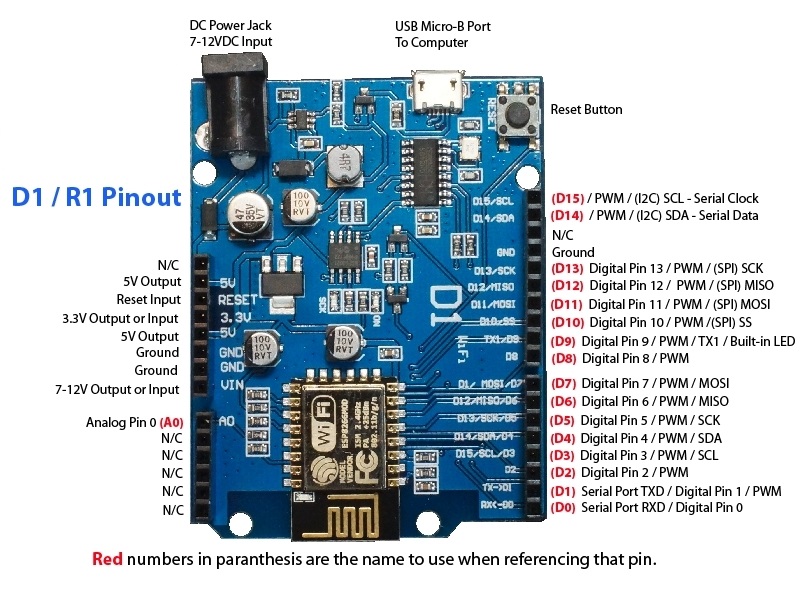
Connect the Sensor to the WeMos D1 using the pins below.
HC-SRO4 sensor
WeMos D1 R1
VCC
5V Output
Trig
Pin D12
Echo
Pin D13
GND
GND
Put the sketch code below in a new sketch in the Arduino IDE, compile and Upload. In the serial monitor you should see the distance measured change as you move an object in front of the sensor. (If you want to improve the accuracy https://www.intorobotics.com/8-tutorials-to-solve-problems-and-improve-the-performance-of-hc-sr04/ ).
In Isadora add an OSC Multi Listener actor. As we are using the same message name “/test” the Sensor value should appear in the output of the actor. Set the input type to float and use a float to integer actor to convert the value.
code:// OSC_ESP8266sendMessage-sensor.ino.zip
Problems
If the sketch doesn't compile, check you have selected the right board in the tools menu. Did you install the Boards? Did you install the libraries? Compiles but won't upload, check you have selected the right port in the tools menu. Did you install the drivers?
Conclusion
All well and wonderful your device is streaming stuff into Isadora and everything works. You go to another venue, use the WiFi and everything stops. Maybe your computer IP has chsnged or the ESP8226s IP has changed (You can use a phone app like Fing to see whats on the Network your using and see the allocated IP numbers) You may have to upload all the new information (WiFi SSId and password etc) to each ESP8226 device your using. You could use the WiFiManager library to solve the SSID/Password issue and use a static IP on your computer to solve these problems. You can upload a sketch using OTA (Over The Air) (https://randomnerdtutorials.com/esp8266-ota-updates-with-arduino-ide-over-the-air/). I haven't tried this but it looks like a good solution. That's it for getting data from the ESP8226 using OSC and WiFi. Next..sending stuff to the ESP8226.