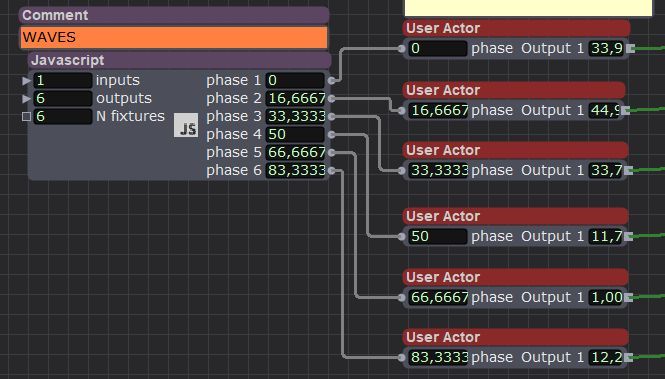
Q3: try connecting your control to the Trigger input. it's in the wrong place at the moment.

also: with Isadora, you don't need to have a specific actor to input a value into another actor. if this value is going to stay the same, you can just type it in and leave it there.
User Actors are great, but you need to make sure to save the correct instances of them. I think you are over-complicating your user actor by nesting other user actors inside it. also, you don't need so many Projectors in your patch. Try using a Video Mixer or Multi Mix/Video Fader combo and daisy chain your Text Draw actors together using the Vid GPU input at the top of each Text Draw. OR: use only one Text Draw actor and use a series of Trigger Text actors to dynamically change the input of the Text Draw.
Hi @pellemolde,
Arguably, the best method for collecting live data, as you describe, is through access to an API server. There are some free public-access data servers with accessible APIs. A good one to explore is the World Bank as it publishes accessible information freely from global sources. You will find APIs for gold prices, but many require a subscription and usage license - free data is often limited by the number of requests you make for updates. This request frequency can challenge your idea of 'live' data. An appropriate API can also be used to access historical gold price data.
I have a demonstration project that pulls live data from the World Bank API and uses the dataset to display countries and their capital cities on a 3D globe. The globe uses the Longitude and Latitude data from the current accessed update data set to display where the country and city are located on the world globe. It is a base for adding other live data sets, an example might be current population or pandemic cases etc.
Feel free to unpack the Isadora v3.2.6 or v4.1.3 project file and ask any questions. download .zip

Hi all again
I am just following up on this. I have some related queries if anyone can point me in the right direction.
I did not want to start a new thread so I am assuming it is ok to use a similar thread on this topic...?
I have been issued with an excel sheet of movements with the Timecode markers.
Query 1:
I have been going through this file with some updated information from the musicians behind the scene.
For the running of the piece, they are looking for the Conductor's monitor to a) display timecode - fine and no issue, b) display the name of each movement at the timecode point.
For this second part, I am using a timecode comparator and triggering a user actor to snap in/fade out a projector intensity for the required text as a lower third. The logic of this seems to work and it is fine per single utterance of the TC & user actor here
To make it "smarter", I am looking to put all of this in a second user actor so I can update the one item and move on. There are approx 50 time code points and names. I have made three so far and all are contained in the now one user actor. The problem I am running into is that the text order and the timecode keep changing upon edit e.g. if I edit the first TC point and then edit the second it seems fine. When I leave the user actor (save etc) and go to the top level, the times and text information have all changed.
I believe that it is my user actor within user actor that is the problem....? I can separate all TC triggers out but I am looking to keep the properties of the user actor for the inevitable editing that will happen down the line.
Is there a trick here that I am missing?
Query 2:
- I am looking to run a control panel for the rehearsals with the scenes ready for triggering. As noted, I now have the TC action points for the movements and I want to be able to click a button and jump to that point in the track. Once the scene is lined up, I can then press the play button. Simple and rinse and repeat.
I was planning to use the trigger value actor but now that I have the timecode per movement, is there a "better" way to do this? I am stumped as to how to convert the timecode to a trigger value. I am sure there is a way but i cannot figure it out. There is not doubt a way here and again would be grateful for a pointer.
Query 3:
- I am not sure if this is a bug or a quirk that I am unaware of.
I have created a user actor for Play/Pause/Reset. This is simple enough and utilises p & r on the keyboard.
Whenever, I use the control ID, the input/keyboard watcher letters all disappear from the actor and I have to reset them in the user actor. It seems that control ID/connection does not like the user actor. I have tried a couple of options, targeting directly into the user actor, changing settings on the control ID pop up box etc.
I cannot see where I am going wrong here and would be grateful for a pointer please.
I am attaching the file here to for others to see my patch.
I do not wish to have others do the work for me but I am just looking to see where the errors may be in my syntax etc.
I am running the latest version of the Isadora.
thank you all.
eamon
Hello, I'm fairly new to Isadora, but am working on a project where I need to retrieve live chart data from a website. One of the charts needs to be the live price of gold. Afterwards I will be linking this data to a volume control for some audio. I can't quite figure out how to get the data for the gold price into Isadora. Does anyone have any ideas?
Thanks!
I've been searching around for fluid simulations on shader toy and the ones that interest me have multiple buffers. I read that using buffers in GLSL actors will eventually arrive. Not yet??
Thanks!
Some ideas (though I admit I don't work with 3D much in Isadora):
Use the 3D actors:
- Import the .3ds file into Isadora and select it with the 3D Model Particles or 3D Player actor in Isadora.
- Feed your video as the texture input.
- Adjust the model’s scale, rotation, and translation until the face is aligned with your physical setup.
- If the print is concave, you can flip the normals (inside-out mesh) or rotate the camera 180° to “project” into the cavity.
- Once it looks correct virtually, align the projector physically to match this digital view.
(Again, I don't know that what I'm saying here fully makes sense because I don't work with 3D very much, so take all the steps above with a grain of salt.)
Use GLSL:
- You could use the existing TT GLSL "TT Bulge Distortion"
- You could also try this new TT Bulge Warp shader that I've just put together (I don't know if it's any good):
/*
TT Bulge Warp - Fragment Shader
version v1.3
*/
// ISADORA_PLUGIN_NAME("TT Bulge Warp")
// ISADORA_PLUGIN_DESC("Applies a controlled radial bulge/concave distortion. Adjustable center, radius, and tiling.")
// ISADORA_FLOAT_PARAM(bulge_amount, bulg, -7.0, 7.0, 0.3, "Amount of bulge. Positive = bulge, Negative = pinch.")
uniform float bulge_amount;
// ISADORA_FLOAT_PARAM(radius, radi, 0.0, 1.0, 0.5, "Radius of effect from center, as 0–1 proportion of image.")
uniform float radius;
// ISADORA_FLOAT_PARAM(horz_center, cx, -100.0, 100.0, 0.0, "Horizontal center point (in % of image width).")
uniform float horz_center;
// ISADORA_FLOAT_PARAM(vert_center, cy, -100.0, 100.0, 0.0, "Vertical center point (in % of image height).")
uniform float vert_center;
// ISADORA_INT_PARAM(tile, tile, 0, 1, 0, "Turn tiling on/off. Clamp if off.")
uniform int tile;
uniform vec2 resolution;
uniform sampler2D tex0;
void main(void) {
vec2 uv = gl_TexCoord[0].xy;
// Center position as normalized coordinates
vec2 center = vec2(0.5 + horz_center / 100.0, 0.5 + vert_center / 100.0);
vec2 delta = uv - center;
float dist = length(delta);
// Only apply within radius
float effect = smoothstep(radius, 0.0, dist); // 1.0 near center, fades to 0.0 at radius
float r = dist;
float theta = atan(delta.y, delta.x);
// Only modify r inside radius
float r2 = mix(r, r + bulge_amount * pow(r, 2.0), effect);
vec2 warped = center + r2 * vec2(cos(theta), sin(theta));
if (tile == 0) {
warped = clamp(warped, vec2(0.0), vec2(1.0));
}
gl_FragColor = texture2D(tex0, warped);
}
Additionally, here's our GLSL Shader Actor Tutorial Article for Isadora
Since you're trying to modify existing shaders, the part of the article that's probably most relevant for you is Tutorial 3: Adding Real-Time Parameters to a Shader as this tutorial explains the format of variables. In particular, knowing how to adjust the 'min' and 'max' associated with a variable is quite helpful:
Tutorial 3: Adding Real-Time Parameters to A Shader
The really exciting opportunity offered by the GLSL Shader actor is the ability to manipulate shader parameters in real-time. Shaders accept real-time input through a mechanism known as uniform variables. For example, if you wanted the shader to receive a floating point number, you would add a line like this.
uniform float myVariableName;
This defines a floating point number called myVariableName as an input. Then, you would use that variable in your code as needed. The trick here is to make that variable available to you as an input to the GLSL Shader actor. This is achieved using a special comment line that you add to the shader like this
// ISADORA_FLOAT_PARAM(name, id, min, max, default, "help text");
In OpenGL Shader Language, any line that starts with "//" is considered to be a comment; in other words, it is ignored by the compiler. But it is not ignored by Isadora. Using comments like the one above, you can create an input for the GLSL Shader actor that sends its value to a uniform variable in the shader
Let's go through each part of this special comment in detail
// ISADORA_FLOAT_PARAM — This portion simply identified what kind of parameter is being defined. In this case, single floating point number.
name— This is where you define the name of the variable. This name must exactly correspond to the variable name given in theuniform variable— statement in the shader code. You cannot include spaces in this name; if you need a space, use the underscore (_) character instead.
id — This identifier, which can be from 1 to 4 characters long, uniquely identifies the input. Should you re-arrange the order of the inputs, Isadora uses this identifier to ensure the links to that input are maintained. For each shader program, this identifier must be unique.
min — For numeric parameters, this defines the minimum possible value for the input.
max — For numeric parameters, this defines the maximum possible value for the input.
default — For numeric parameters, this defines the default value for this input when the actor is added to the scene. This input is only meaningful if you add the source code for this shader to Isadora's GLSL Plugins folder. (More on this feature later.)
"help text" — This defines the help text that will appear in the information view for this input. If you share your shader code, you can help those who use it by providing useful, descriptive information about this input. Isadora's philosophy has always been to make it easy for the user to use the program; giving useful details in the help text supports that philosophy.
Hi there,
I have a video of a head talking that is to be mapped onto a scan that's been 3D-printed as a concave imprint. It would be great to "correct" the distortion in Isadora, if possible.
Any tips for mapping this face better onto the surface to reduce as much distortion as possible? I have the mesh itself. I also was thinking I could get pretty close with some inverted version of the bulge distortion, perhaps?
Best,
Rory
Here is an update that uses the dice roll to match video slices- enjoy if you are interested. download